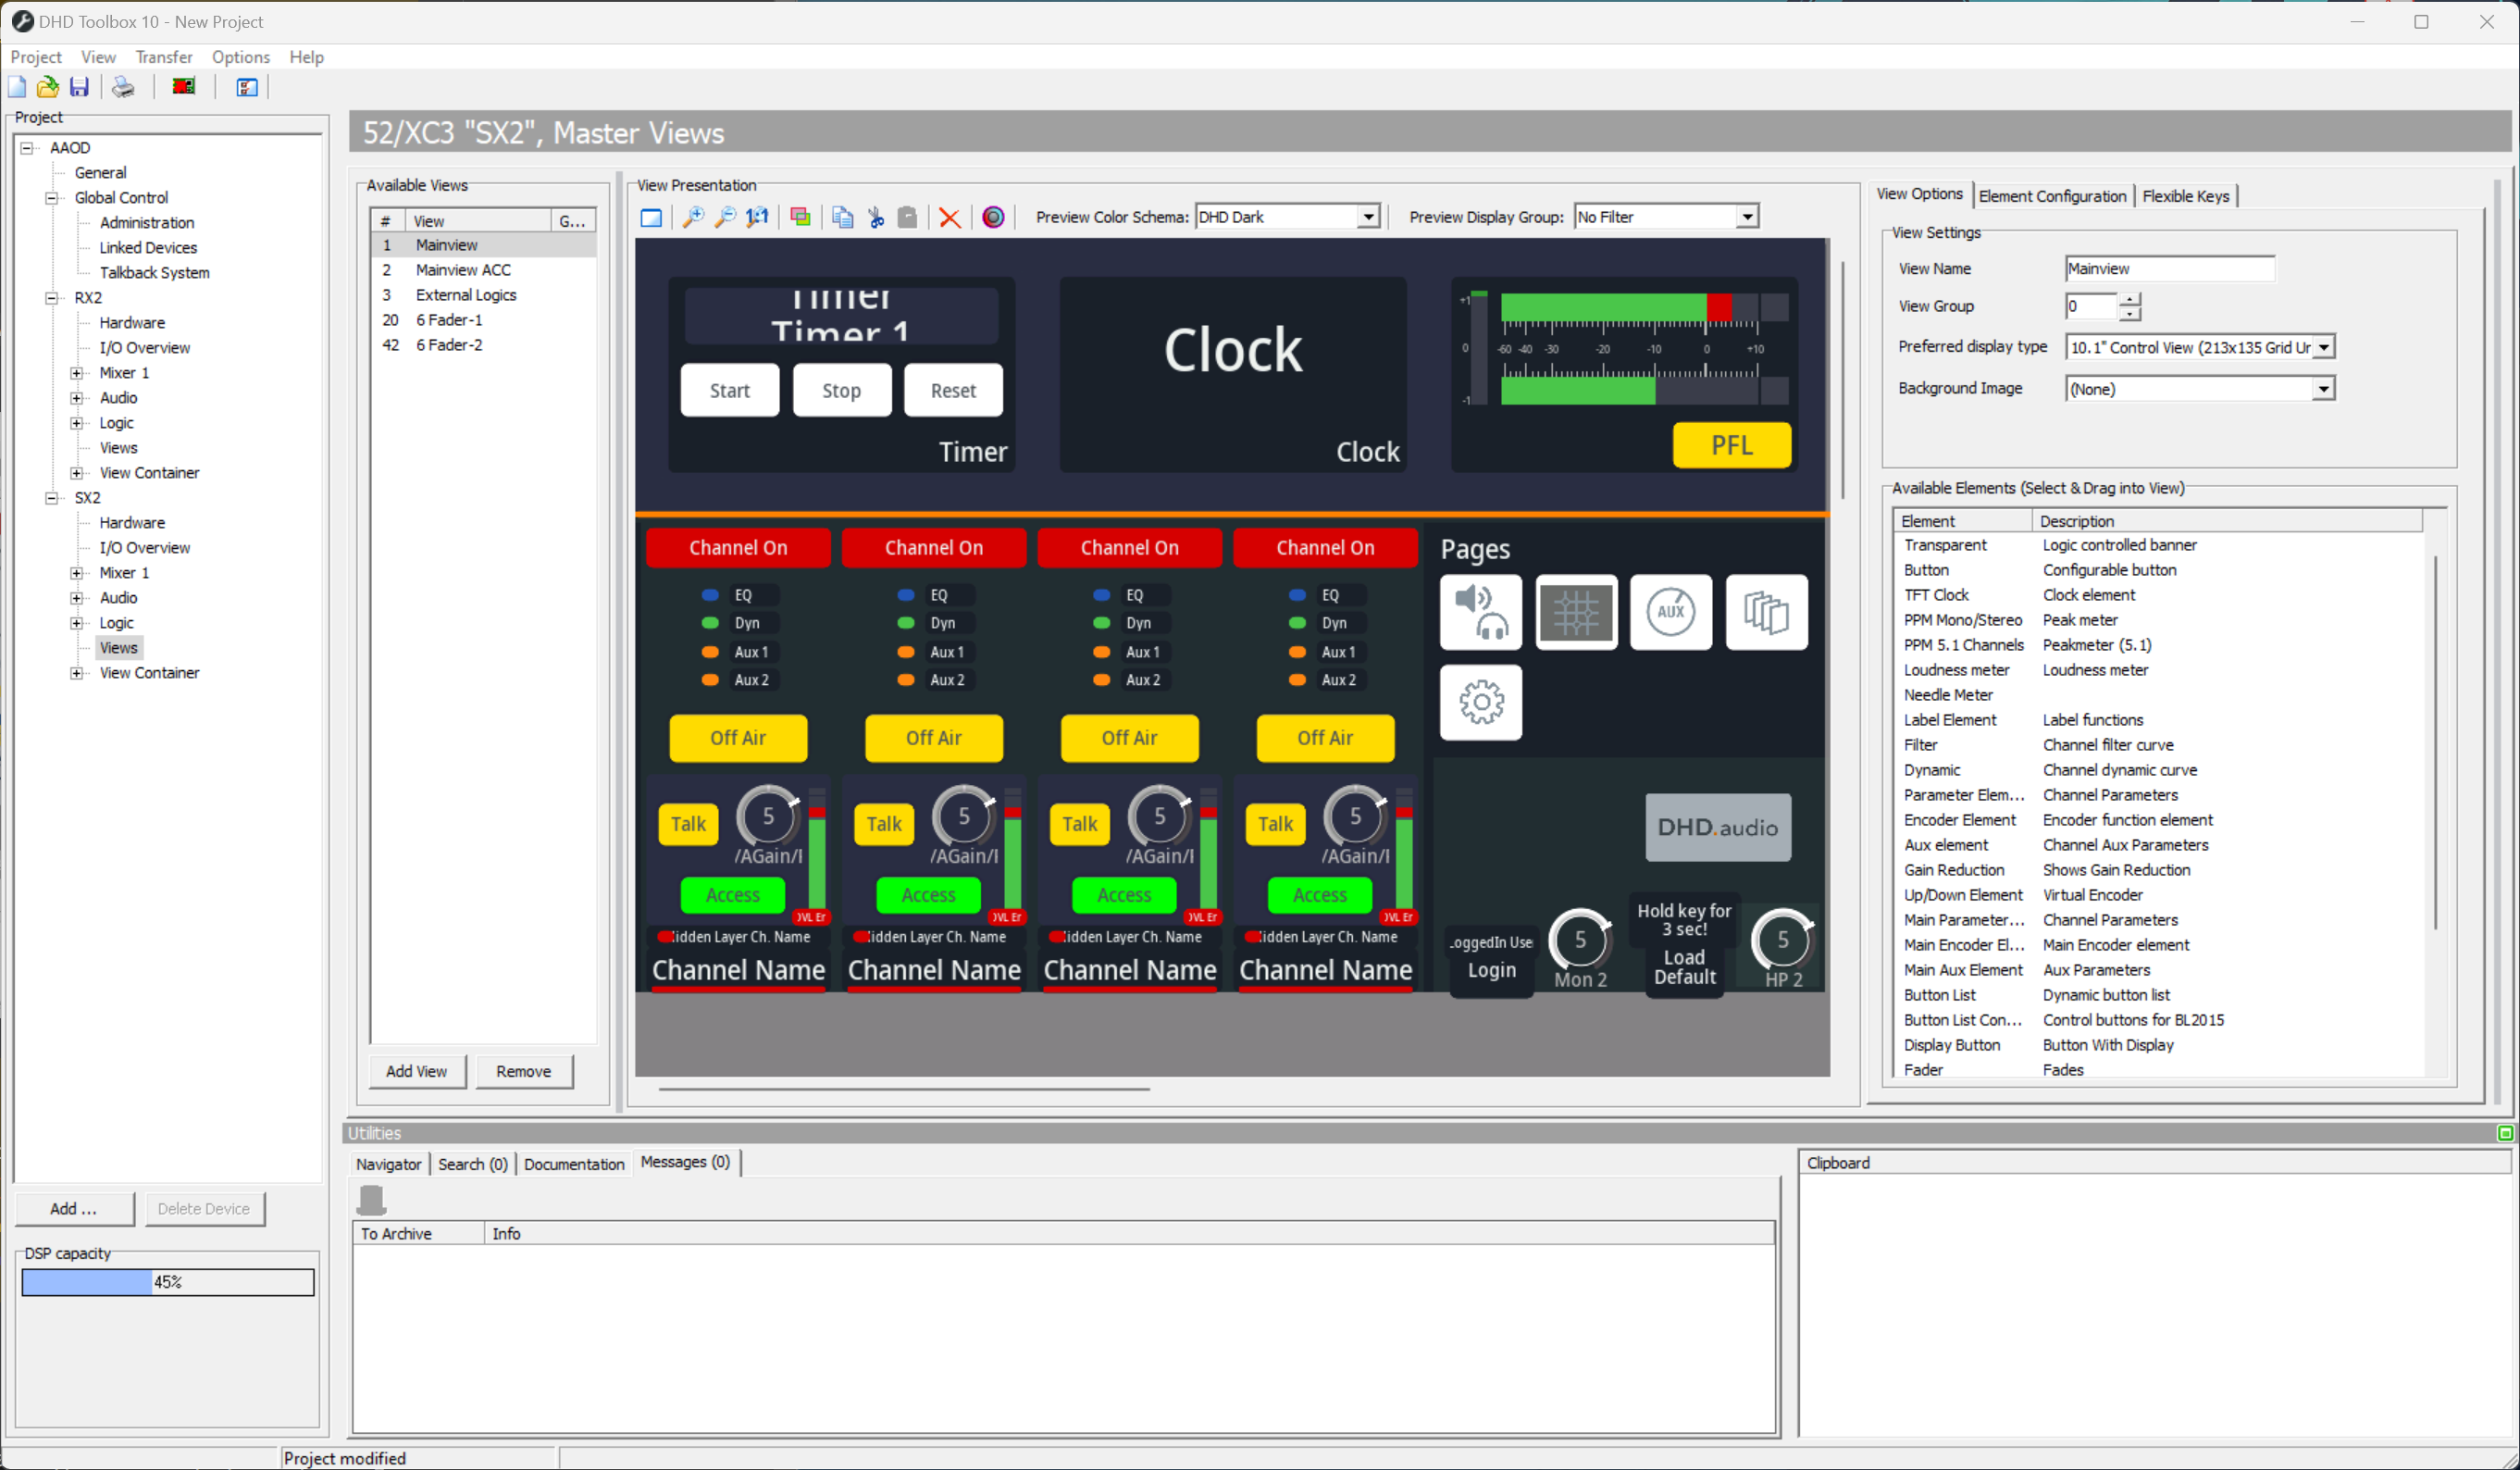
View Types and Options
In the project tree, in the subsection <Device>\TFT Views, you can create different views that are shown on the TFT displays.
This documentation is valid only for devices with the new multi-touch IPS TFT displays. Old TFTs will show a compatibility mode and display the graphics with the old engine. Editing views for compatibility mode remains the same procedure just like working with new TFTs.
View Types
For fader views and master views, you can use the same type of TFT display and operating elements (the timer function is the only one that is only applicable in a master view). Only the possible arrangement of the elements differs a bit.

Master View
A master view can be created as required using the whole area of the TFT display. Master Views can be assigned to any TFT. Master views can also be Access Views.
To add a new Master View, in <device>/TFT Views click Add View in the Available Views area.
A new Master View is created which has no defined size until you select a display type.
In the View Options area on the right hand side, under Preferred display type, decide which kind of display it is for.
10,1" Control Viewis used for views simulating standard display sizes.4015 Control Viewis only kept for compatibility.4018 Control Viewhas the size of a 52-4018 TFT and can also be used for 52-4010 TFTs. 52-4010 TFTs will show the small 52-4018 View with grey borders. Use this option also for 52-1114 (52/DX) TFTs.4010 Control Viewhas the size of a 52-4010 or 52-4012 TFT and can also be used for 52-4018 TFTs. 52-4018 TFTs will only show the upper left part of the View and cut them.5810 Vertical Control Viewis used for RX2 vertical screen views.DX2 Control Viewis used for DX2 views.
To set a Master View as Default display for a specific TFT, go to <device>/<mixer>/Console. Click on the TFT you want to use for the Master View. On Module Options area, select a Default View.
If you want to change your Default View directly on the console, create a Button with Key Function Set Default View.
If you have multiple master view-TFTs, you must assign different TFT Groups. If you want the TFTs to show always the same, set them to the same Display Group.
If Default Views of TFTs in the same TFT Group differ, the Firmware will not work correctly.
Access View
An Access View is always active when you set access on a channel which is in the same access Group. Access Views are always Main Views. Mostly, they are used for e.g. channel input properties.
The Access View is active as long as the access is active. To set access and access view, it is useful to create a Button with the Access Input Select function and check Set Access View. Alternatively, a Button can be created with key function Access View. As long as active, the access view is active and TFT will jump into access view when pressing access button.
Access View will be active as long als a channel is selected. If you want to have specific pages also available in Access View, make sure to have Follow Access on the Set View-Buttons checked.
View Settings
When you create a new view, you have to do some configuration. The configuration is made on the View Settings area on the right hand inside in the View Options tab.
View Name: After Creating a new view, define a distinctive name.View Group: Buttons with Key FunctionSet Viewwill check the current View Group. As long as the user stays in views with the same View Group, the Button will be lit up (active). Useful e.g. for EQ or Dynamics-Pages with more than one View.Preferred Display Type: Choose the Display you want to create the view for. This parameter is vital for the size of the created view and the view editor. Possible configurations:Free(250×250 Grid Units)Free-2 (500x500 Grid Units)4015 Control View4018 Control View10.1“ Control View5810 Vertical Control ViewDX2 Control View (190x60 Grid Units)
Background Image: Select a Background image. For more information on Resolutions and Image files, see Resource Files.