User Management & Toolbox Setup
Toolbox Setup
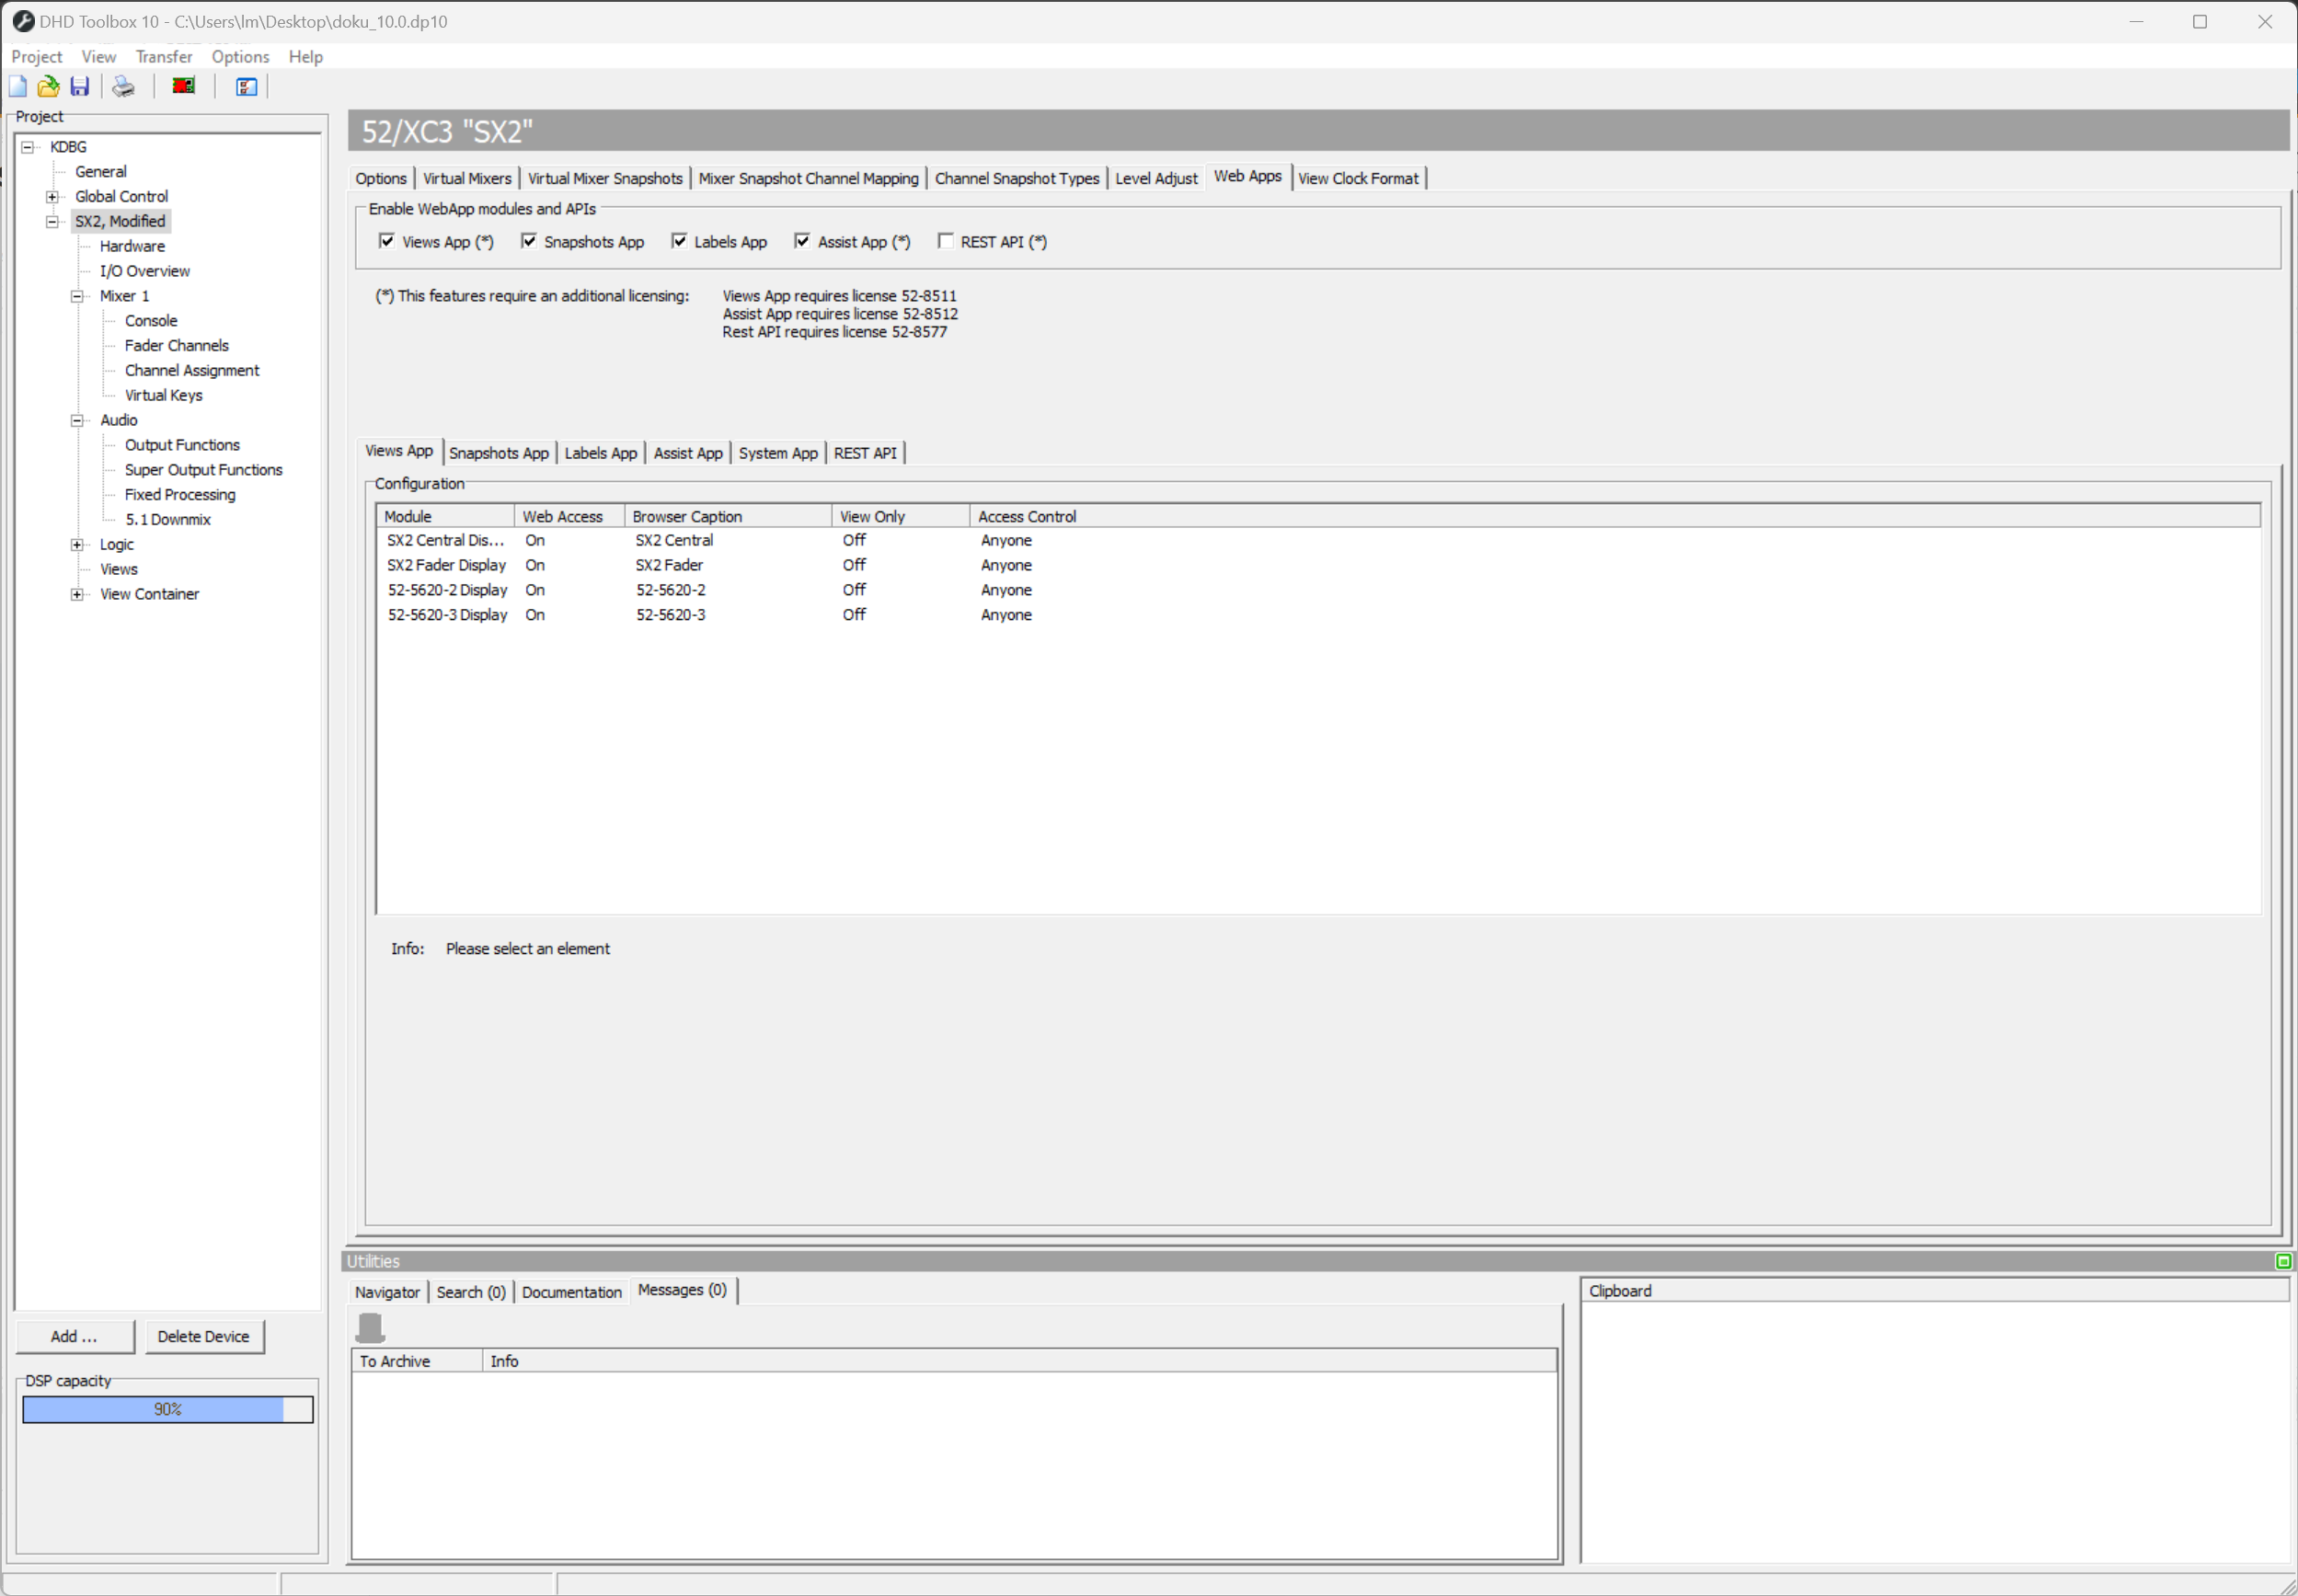
Views App
Views App (Web) routes internal APC TFT connections to the network via the core device's ethernet port, similar to Views App (Windows). However, the configuration process is different. Here is an example configuration:
- Open Toolbox software and config file.
- In
Mixer/Console, create a new console and add a new 52-8511 display. Assign a view, ensuring the correctCentral Display Groupis assigned. - Go to
<device>node in the project tree and select theWeb Appstab. - In
Enable WebApp Modules and APIssection, ensureViews Appis checked. - In the
Views Apptab below,Configurationsection, all modules suitable for web views are listed. Click the line of the newly created 52-8511 display. - In
Module Setupsection, ensureEnable Web Accessis checked.- Enter a
Browser Captionfor easy identification. - Enter custom
WidthandHeightvalues (in grid units). - Set
View onlyto avoid control of the display via the web. - Set access control (see User Authentication).
- Enter a
- Send your configuration to the device.
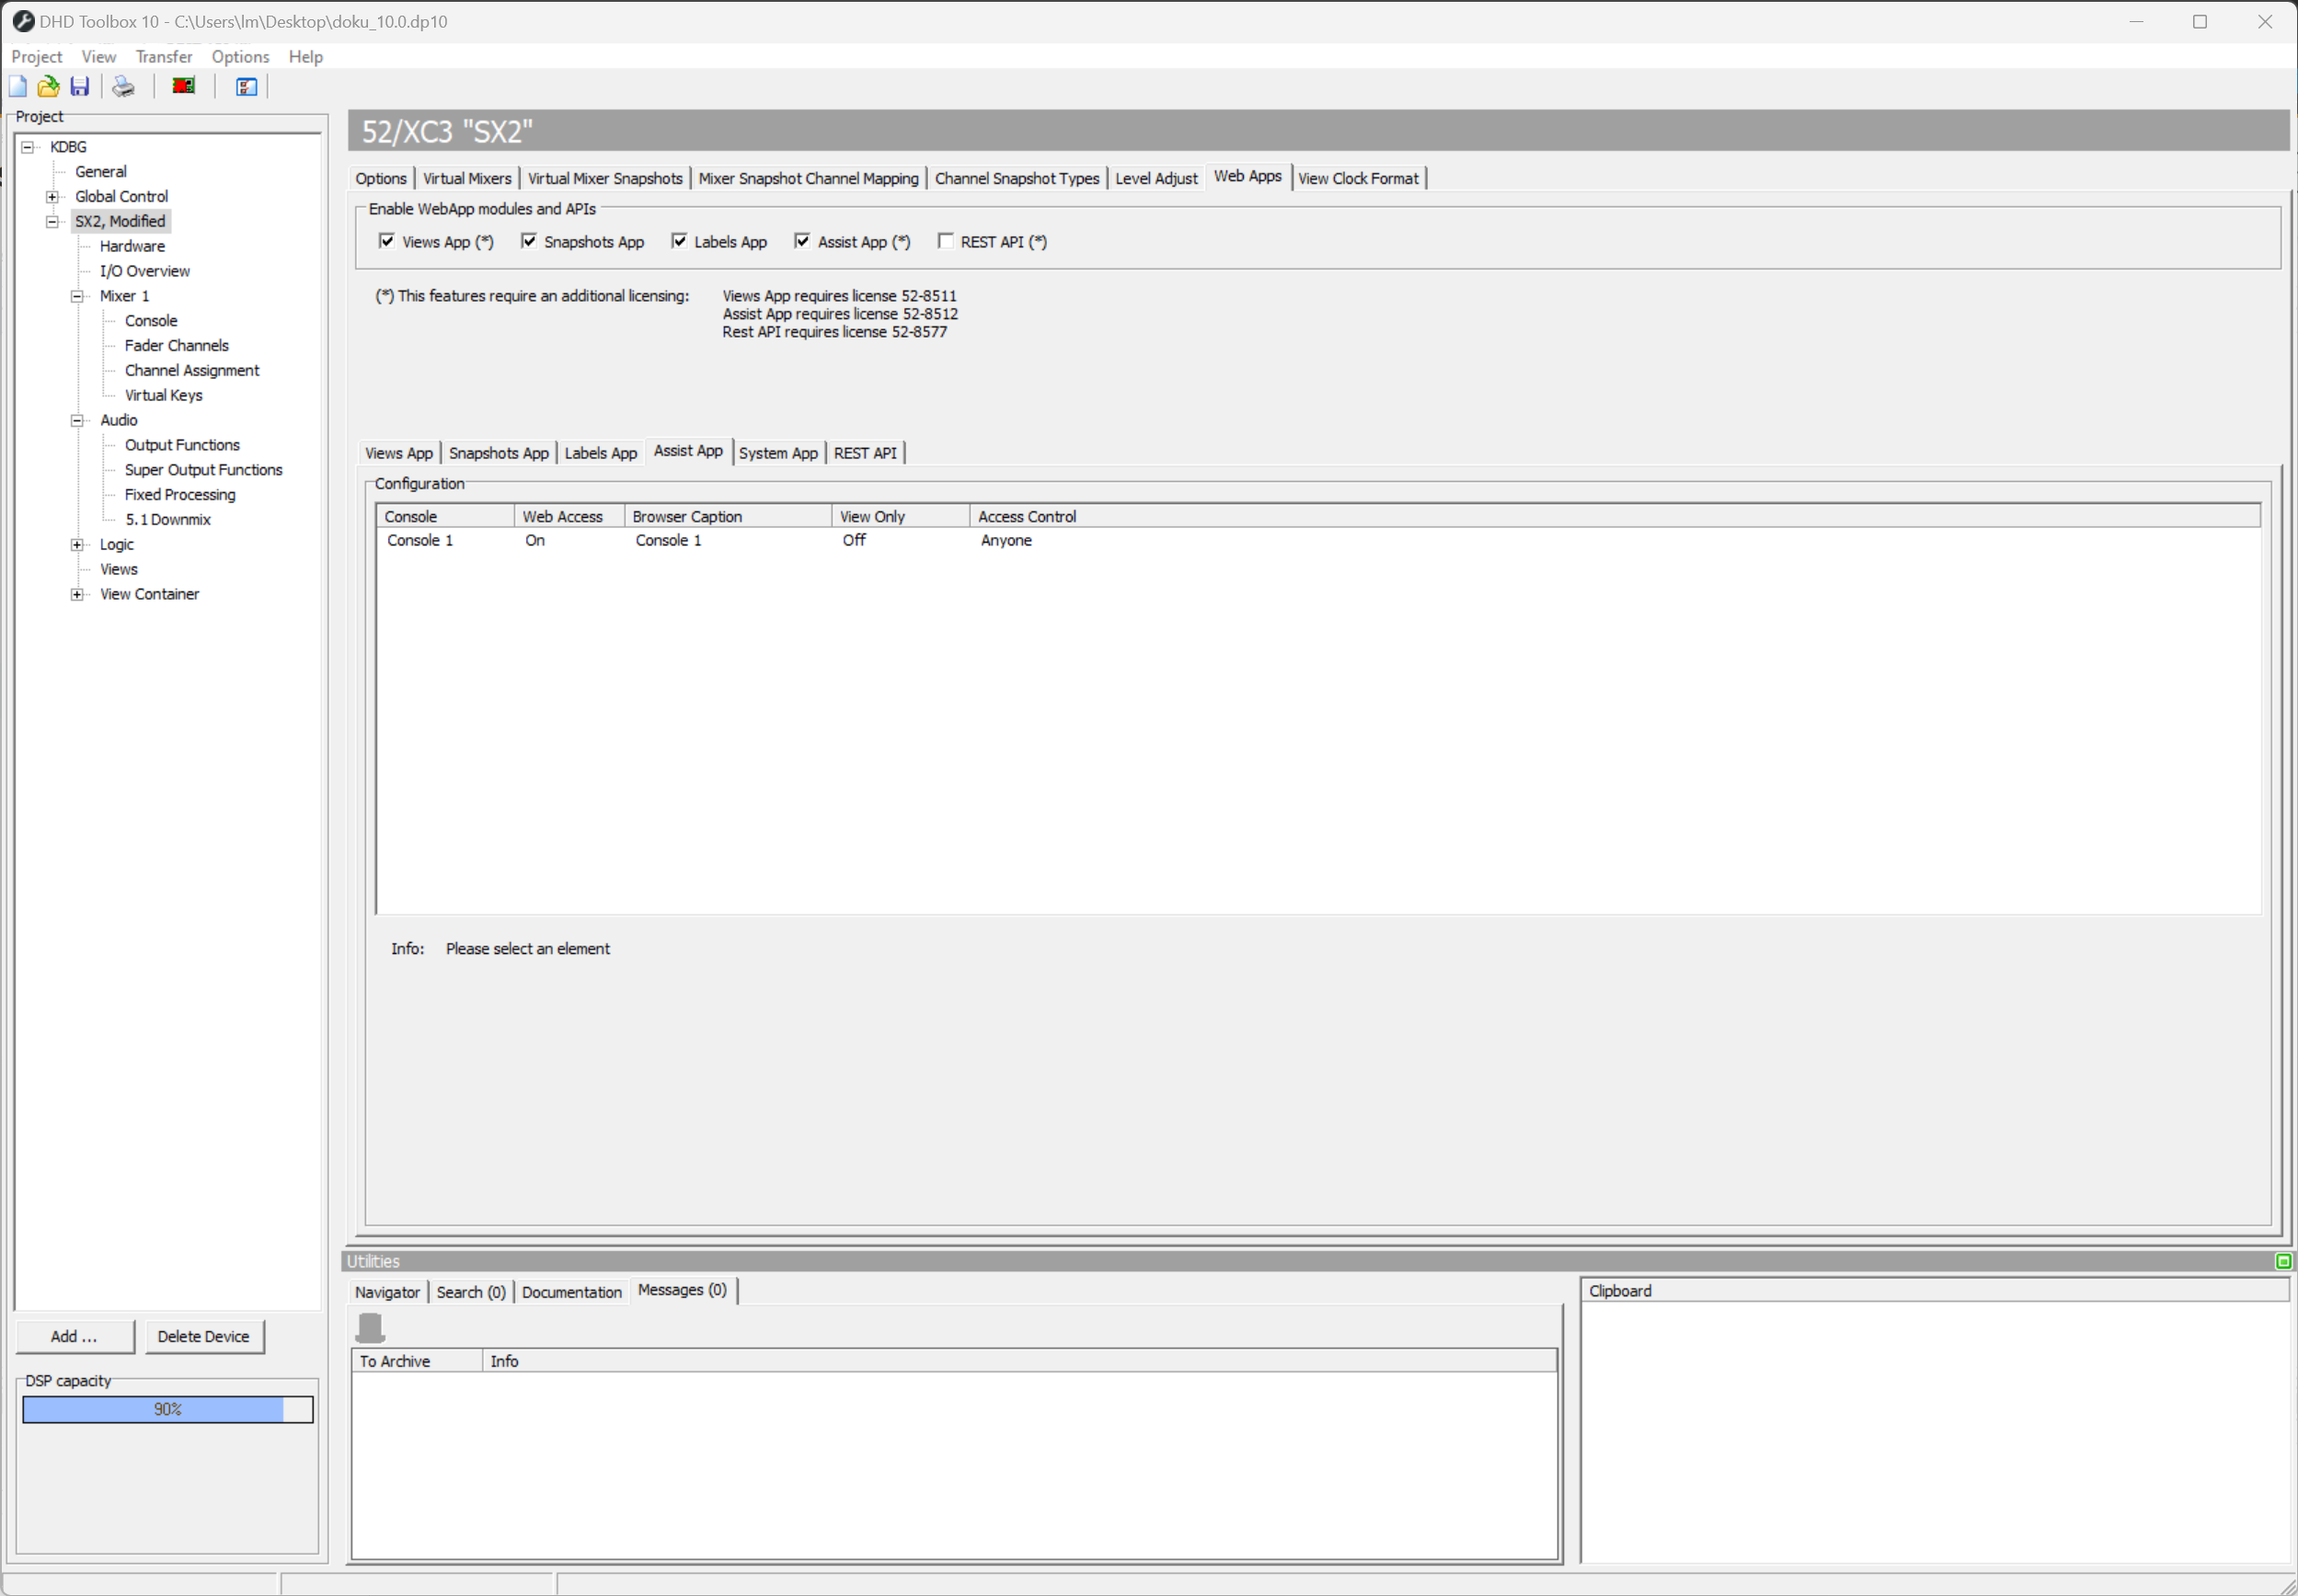
Assist App
Assist App routes internal APC module connections to the network via the core device's ethernet port using websocket connections.
- Open Toolbox software and config file.
- In
Mixer/Console, create a new console and add a new RX2, SX2, or 52/TX Console. Assign a view, ensuring the correctCentral Display Groupis assigned. - Go to
<device>node in the project tree and select theWeb Appstab. - In
Enable WebApp Modules and APIssection, ensureAssist Appis checked. - In the
Assist Apptab below,Configurationsection, all modules suitable for web views are listed. Click the line of the newly created console. - In
Module Setupsection, ensureEnable Web Accessis checked.- Enter a
Browser Captionfor easy identification. - Set
View onlyto avoid control of the display via the web. - Set access control (see User Authentication).
- Enter a
- Send your configuration to the device.
Snapshots App
- Open Toolbox software and config file.
- Go to
<device>node in the project tree and select theWeb Appstab. - In
Enable WebApp Modules and APIssection, ensureSnapshots Appis checked. - In
Snapshots Apptab below, set up the correct user level for the designated function (Basic AccessandBackup & Restore, Save Snapshot 0can be protected). Multi-select is possible.

Labels App
- Open Toolbox software and config file.
- Go to
<device>node in the project tree and select theWeb Appstab. - In
Enable WebApp Modules and APIssection, ensureLabels Appis checked. - In
Labels Apptab below, set up the correct user level for the designated function (Rename Fader ChannelsandRename Global Labelscan be protected). Multi-select is possible.
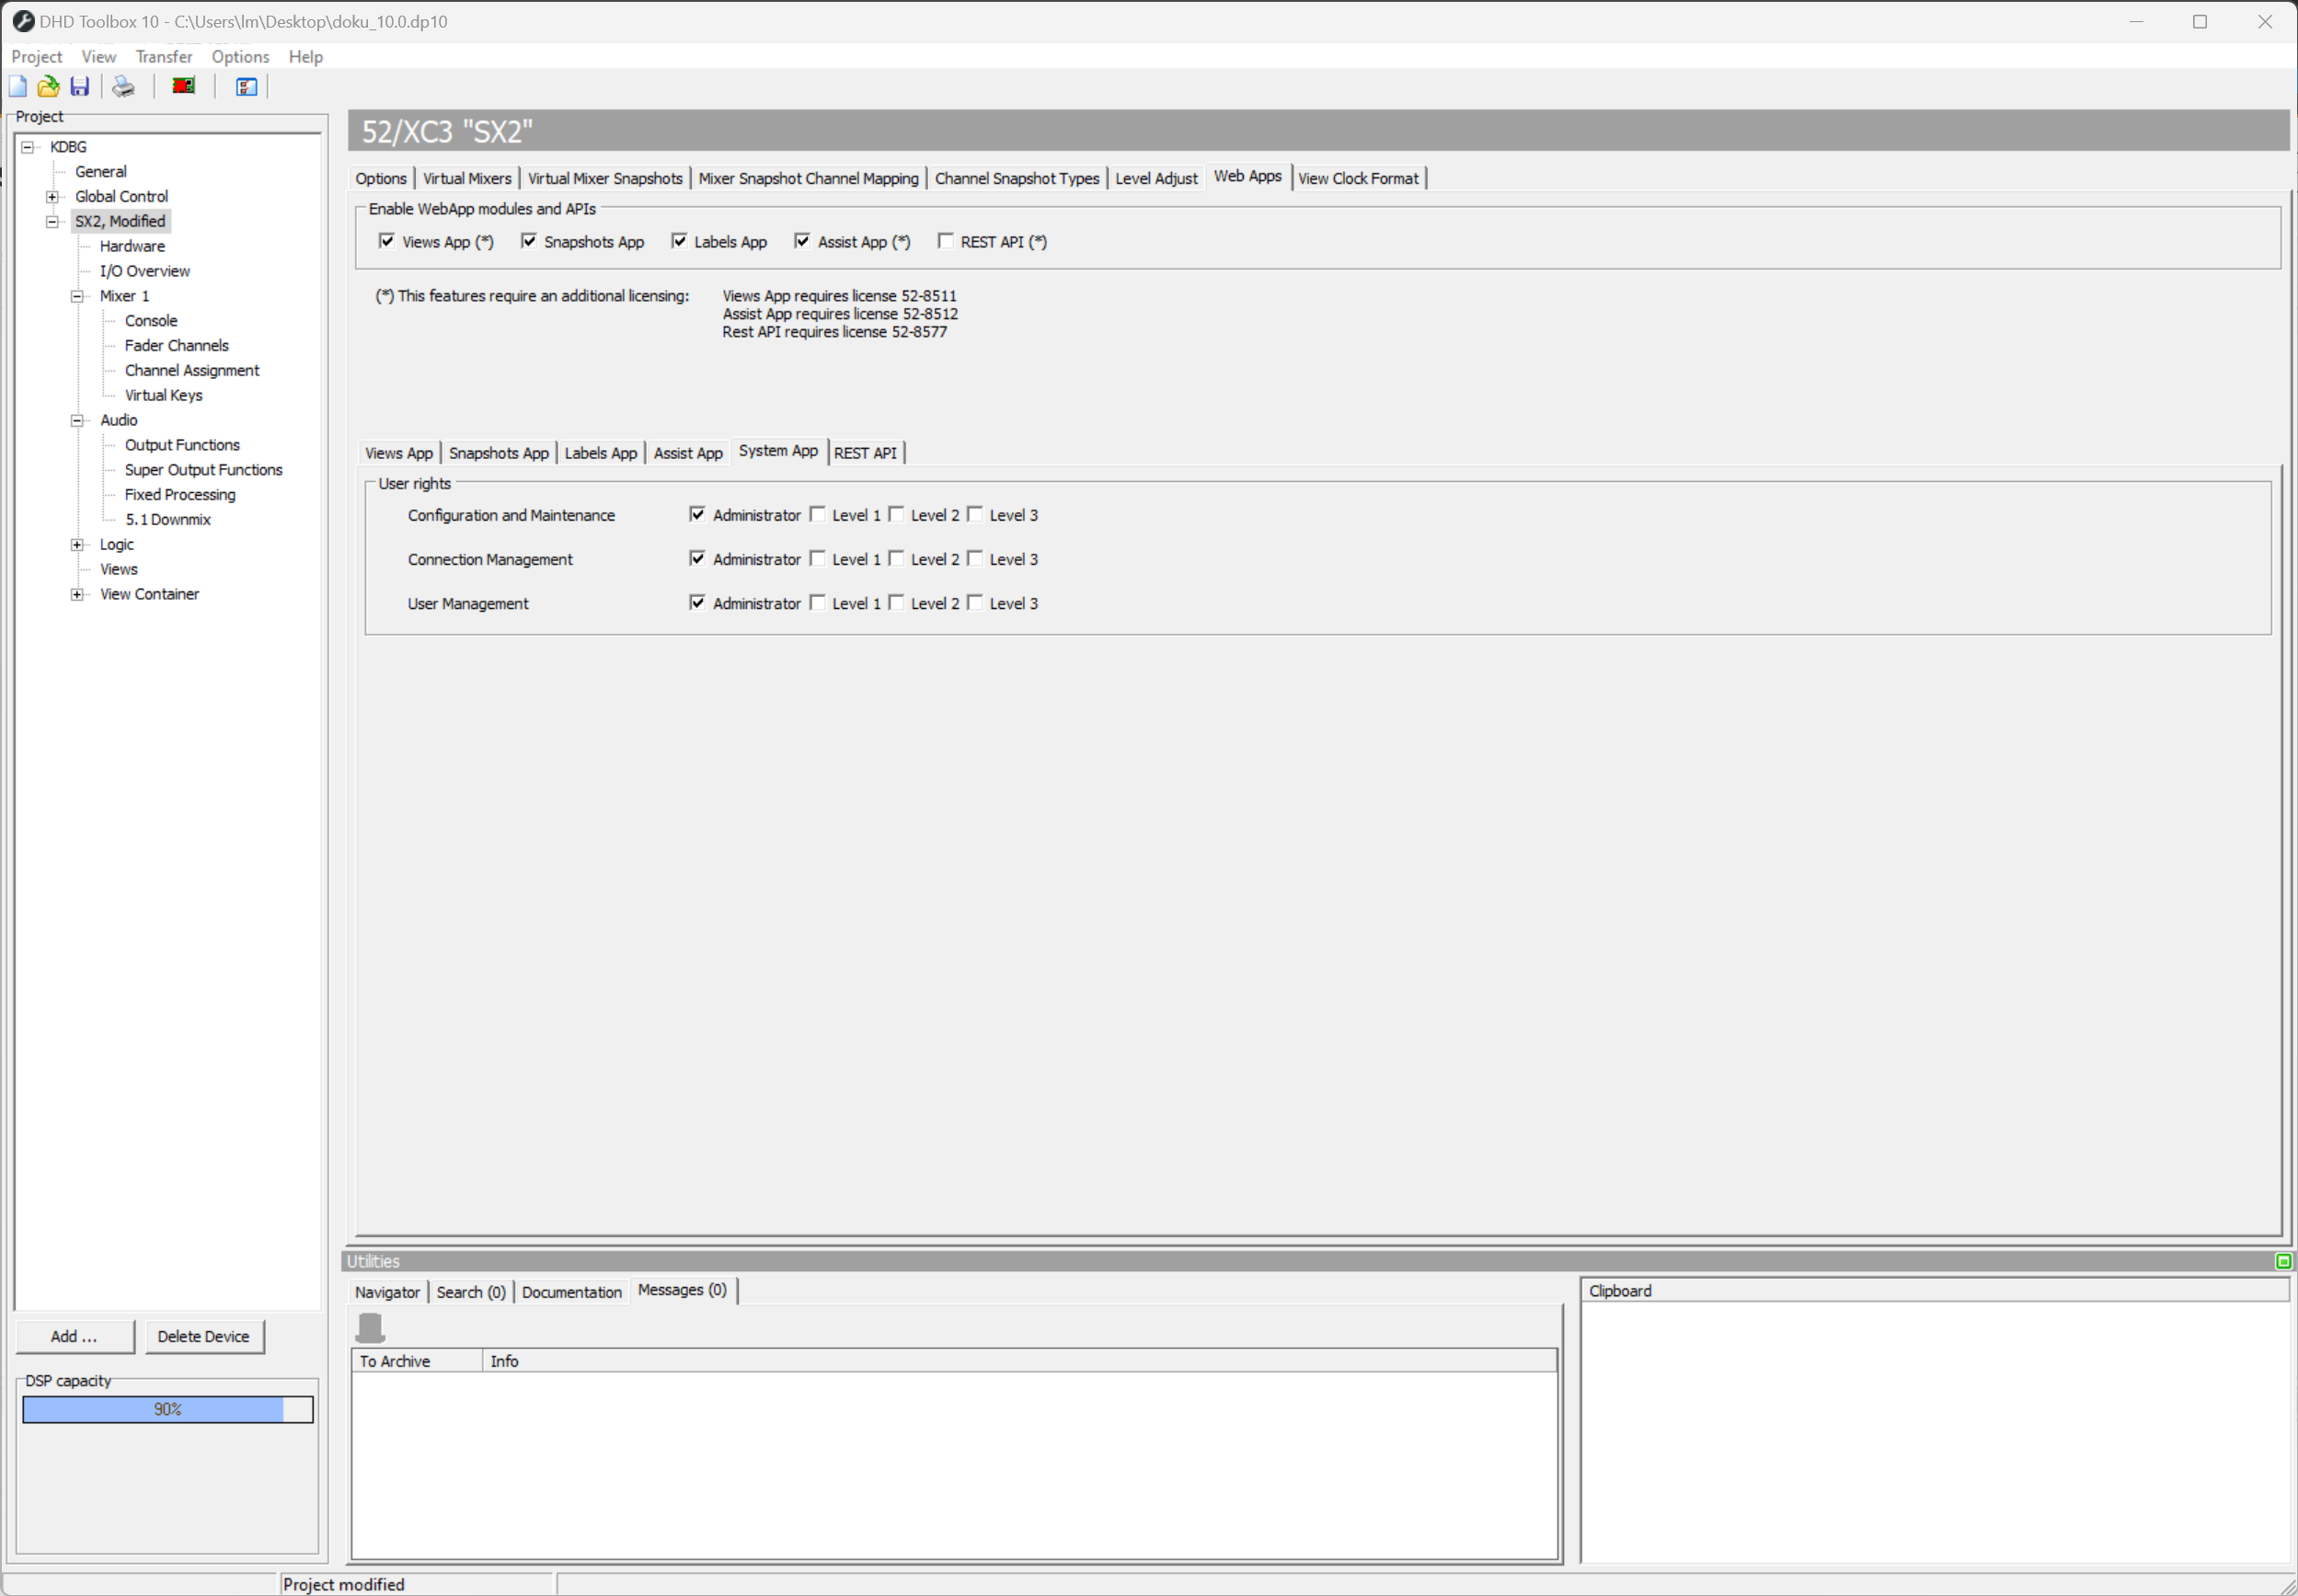
System App
- Open Toolbox software and config file.
- Go to
<device>node in the project tree and select theWeb Appstab. - In
System Apptab below, set up the correct user level for the designated function (Configuration and MaintenanceandConnection Managementcan be protected). Multi-select is possible.
New users need to be added through the System App under User Management
For security reasons, System App user rights group assignment behaves differently than other web apps. If no user rights group is assigned, the functions will not be accessible. Using Configuration and Maintenance and Connection Management functions without login protection is not possible.
User Authentication
Web Apps offers username/password protection based on Toolbox's existing administration mechanisms.
To protect a web app:
- In Toolbox, go to
<device>page and open theWeb Appstab. - Views App: Select the display you wish to protect from the list in the
Configurationsection. InModule Setupsection, set the access levels to assign user permission. - Snapshots App, Labels App: Select the correct user level for the designated function.
- Open Web Apps in your browser and click the
 button in the lower right. Enter your username & password.
 - If the login button is not visible, click the app icon in the upper right. The navigation overlay will open. Here you can log in / log off.
View Only in Views App is a separate function and is not affected by user rights. If you wish that different user groups have view only or full access, consider using different virtual displays.
A user without the right to see and/or use the view will not see any hint that the function exists.
Automatic Login with User Token
Login a user directly, e.g., for stand-alone solutions using HTTP GET. Token is the user-defined token as from Toolbox. Usage:
http://[Core-IP]?token=[User-Token]
You can use this GET argument on any point and state of web apps, for example also in Views App
http://10.5.12.123/#/views/5?token=1234-1234-1234