User Management
User Management page allows you to manage and inspect the access rights of all users as well as grant access to new users.
To access the User Management page you need to be logged into your web apps account. The menu option User Management will otherwise not be available.
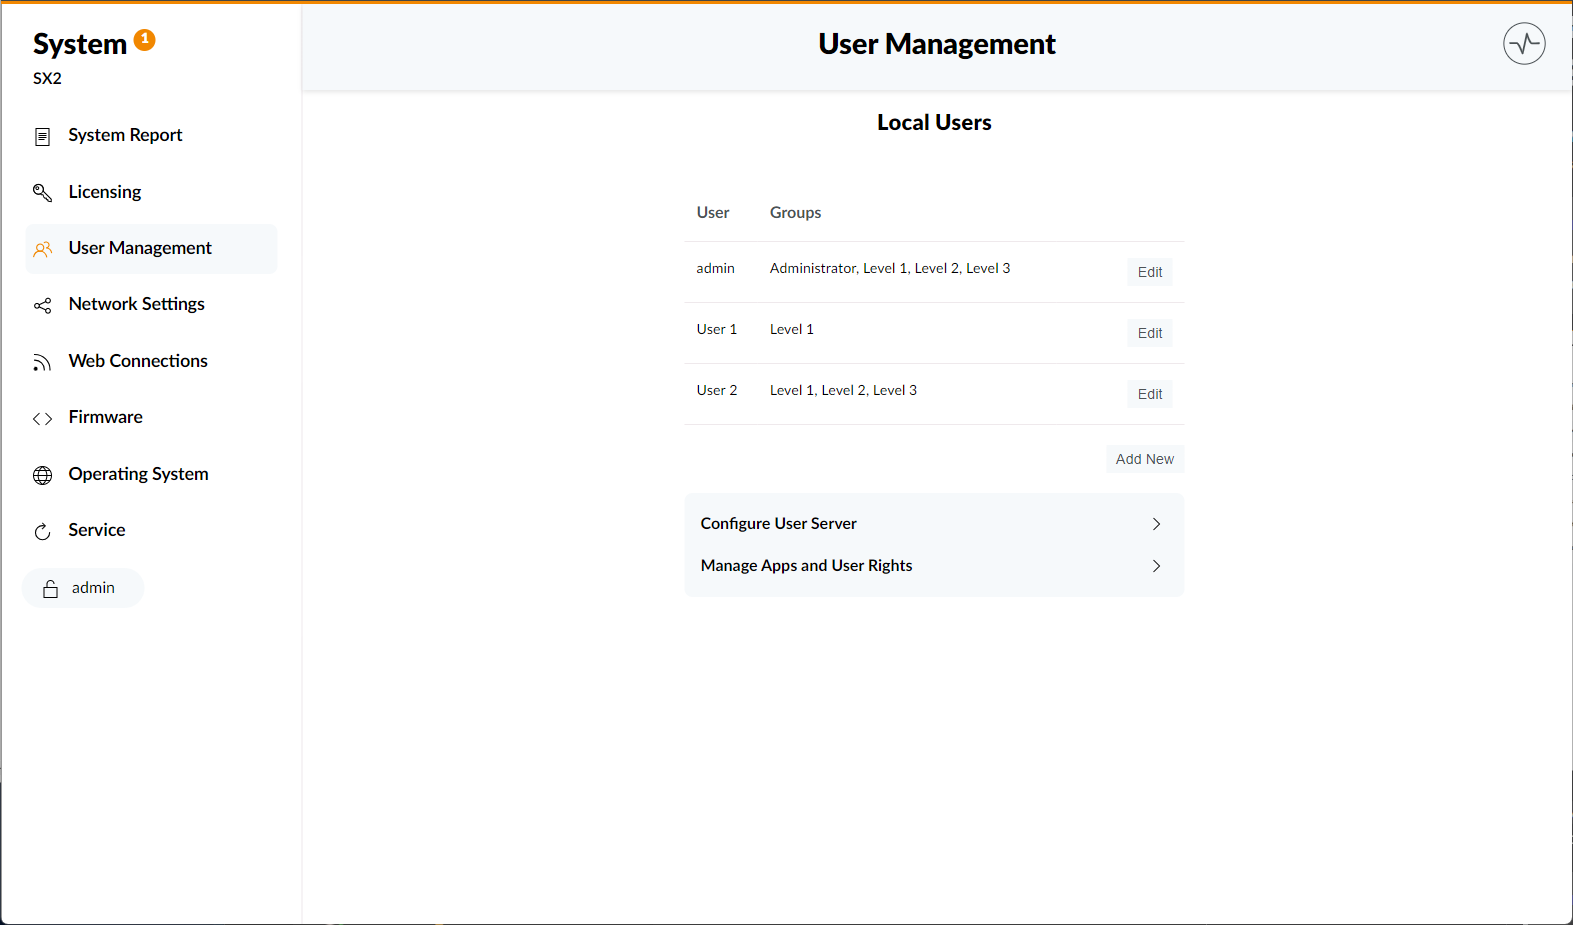
User Names and User Groups are always listed in descending order and can be edited by using the menu option Edit.
User data can only be edited by the system administrator.
Editing User Data
The Edit User page allows the system administrator to access and configure the user accounts data.
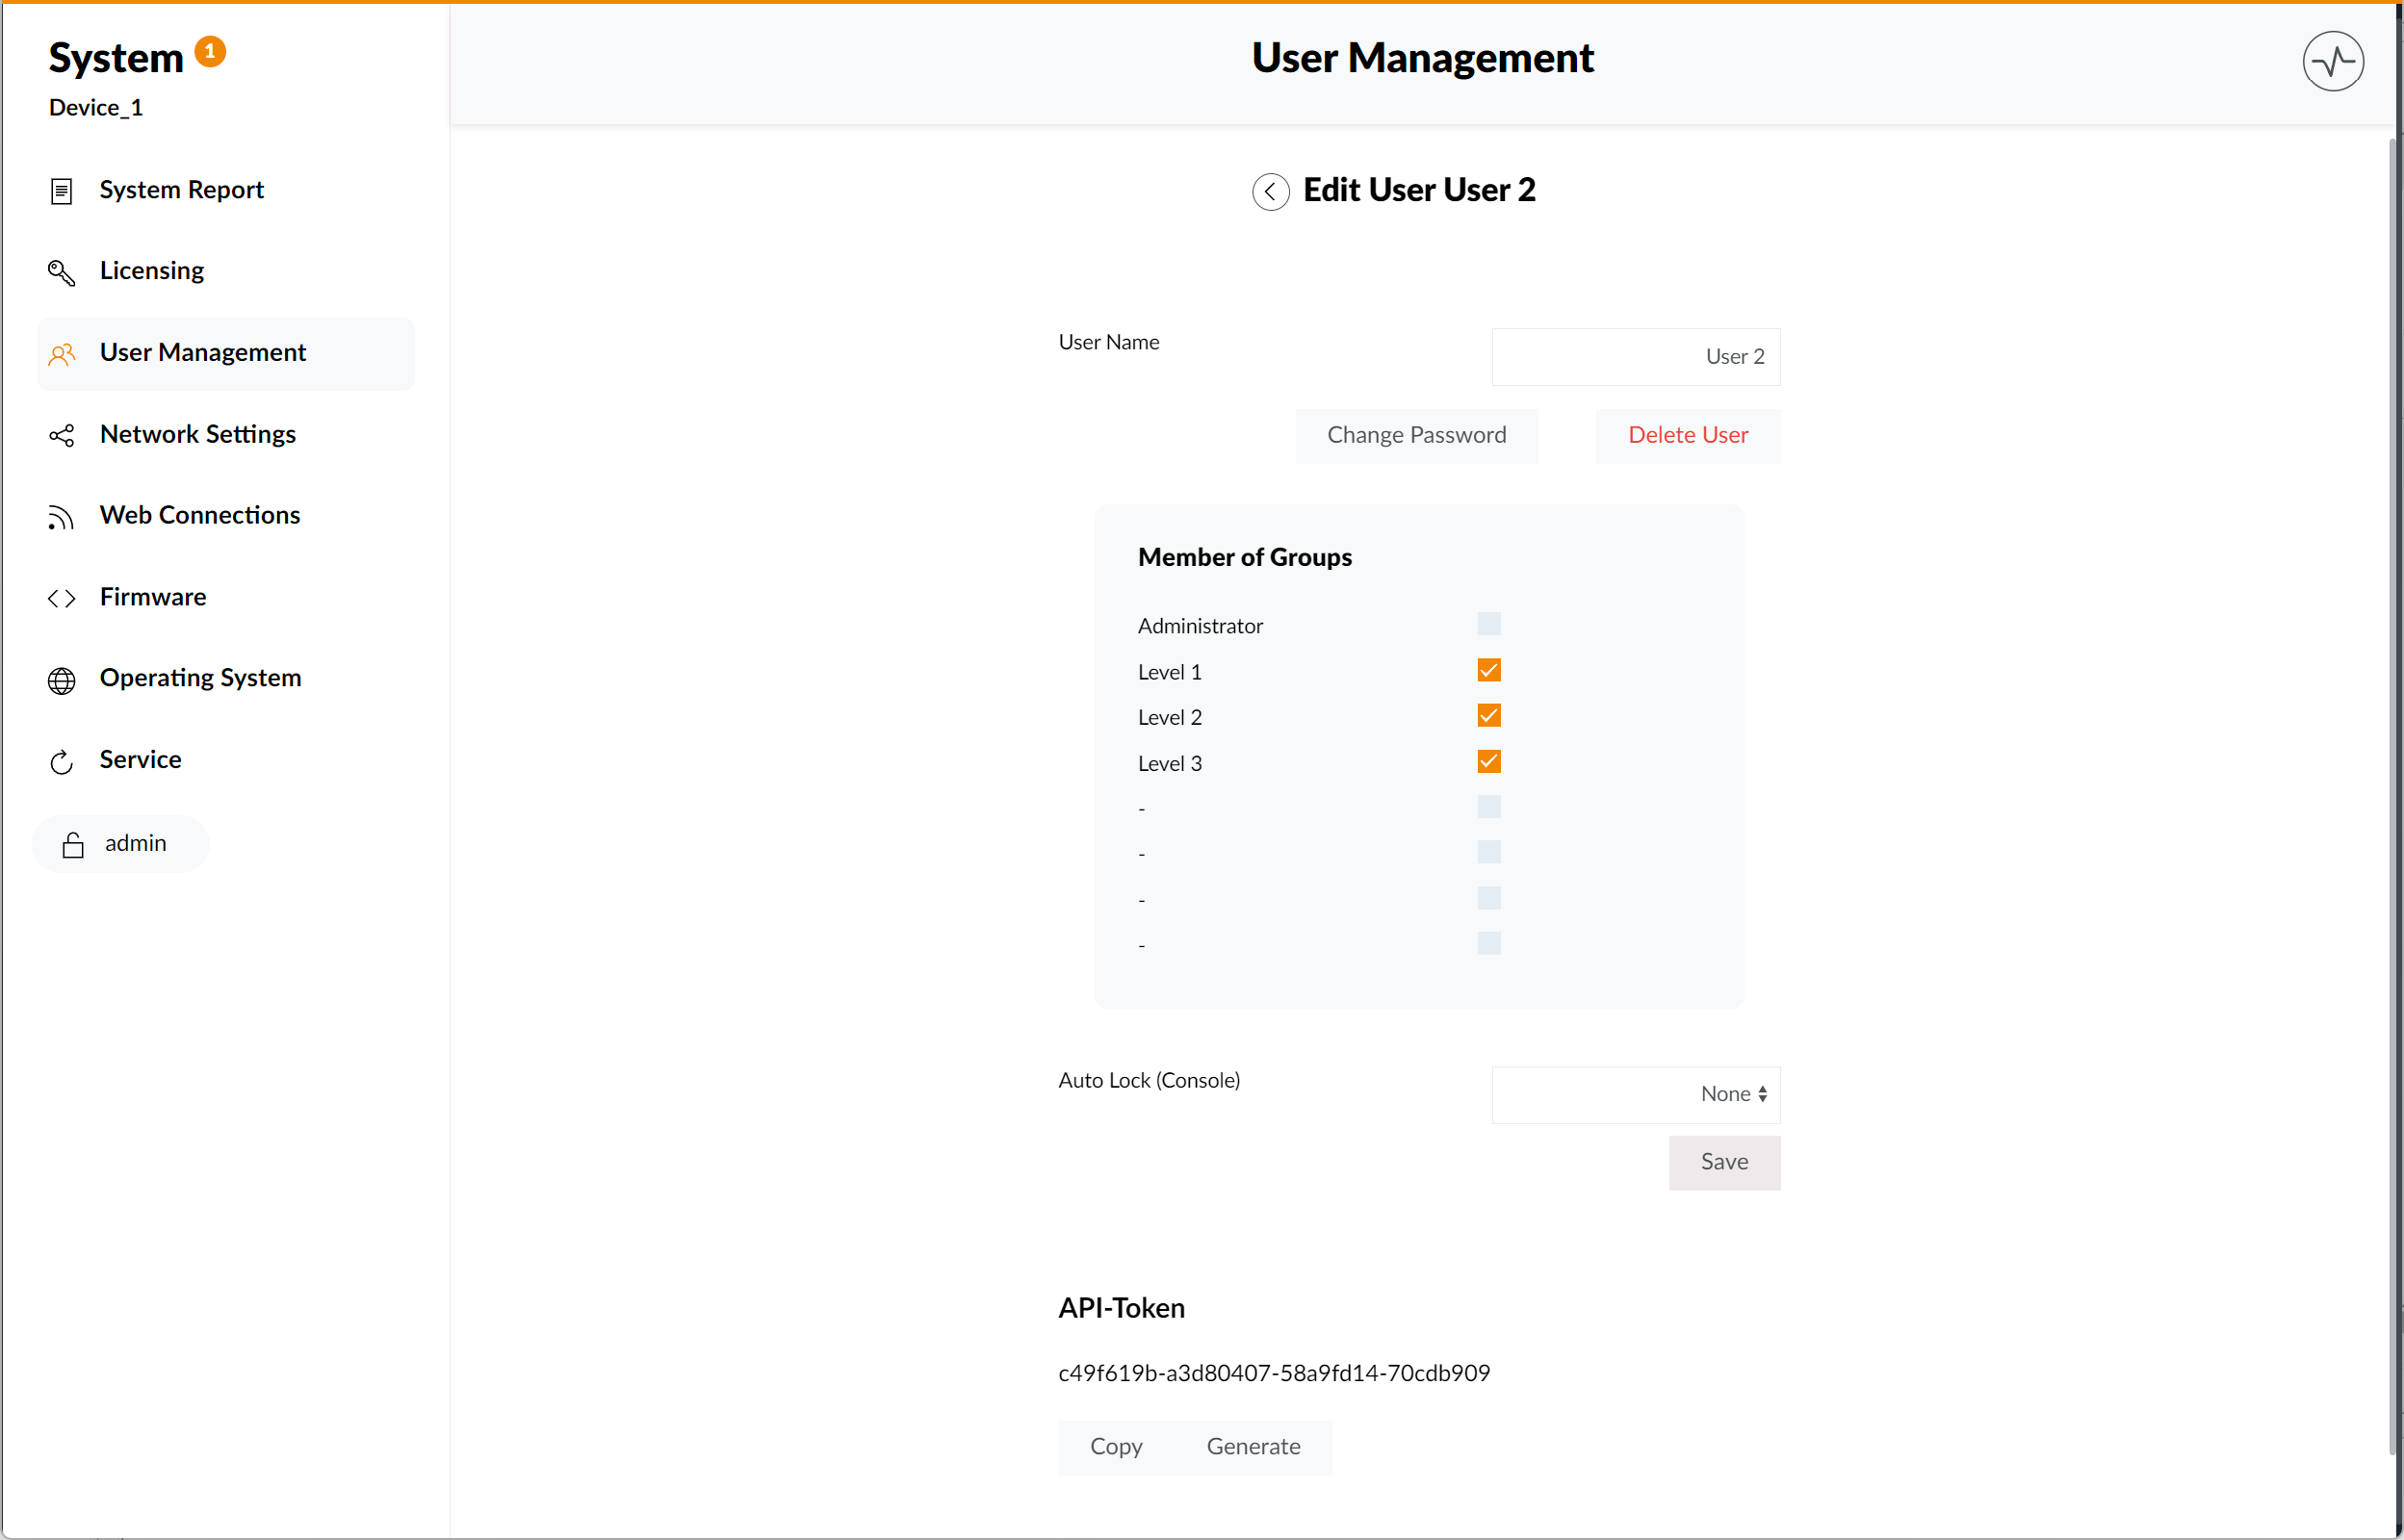
User names can be changed by clicking the User Name text box and adding a new name.
The Change Password option will open up another menu, allowing the administrator to add new password data.
To access a new password, please click the New Password text box and confirm the password via the Confirm New Password text box. To finalize the process click on Change Password. You can always choose to opt out of the process by clicking the Cancel menu option.
Deletion of a user account is also possible via the Delete User button. You will be asked to confirm this decision through a drop-down menu. If you do not want to delete the user account, you can always choose to leave the menu by clicking either the Cancel option or the X button on the drop-down menu.
This decision is final. The respective user account and all edited data will be deleted.
admin user account can not be deleted.
The Member of Groups table allows you to join or leave any authorization groups, that were created by the system administrator.
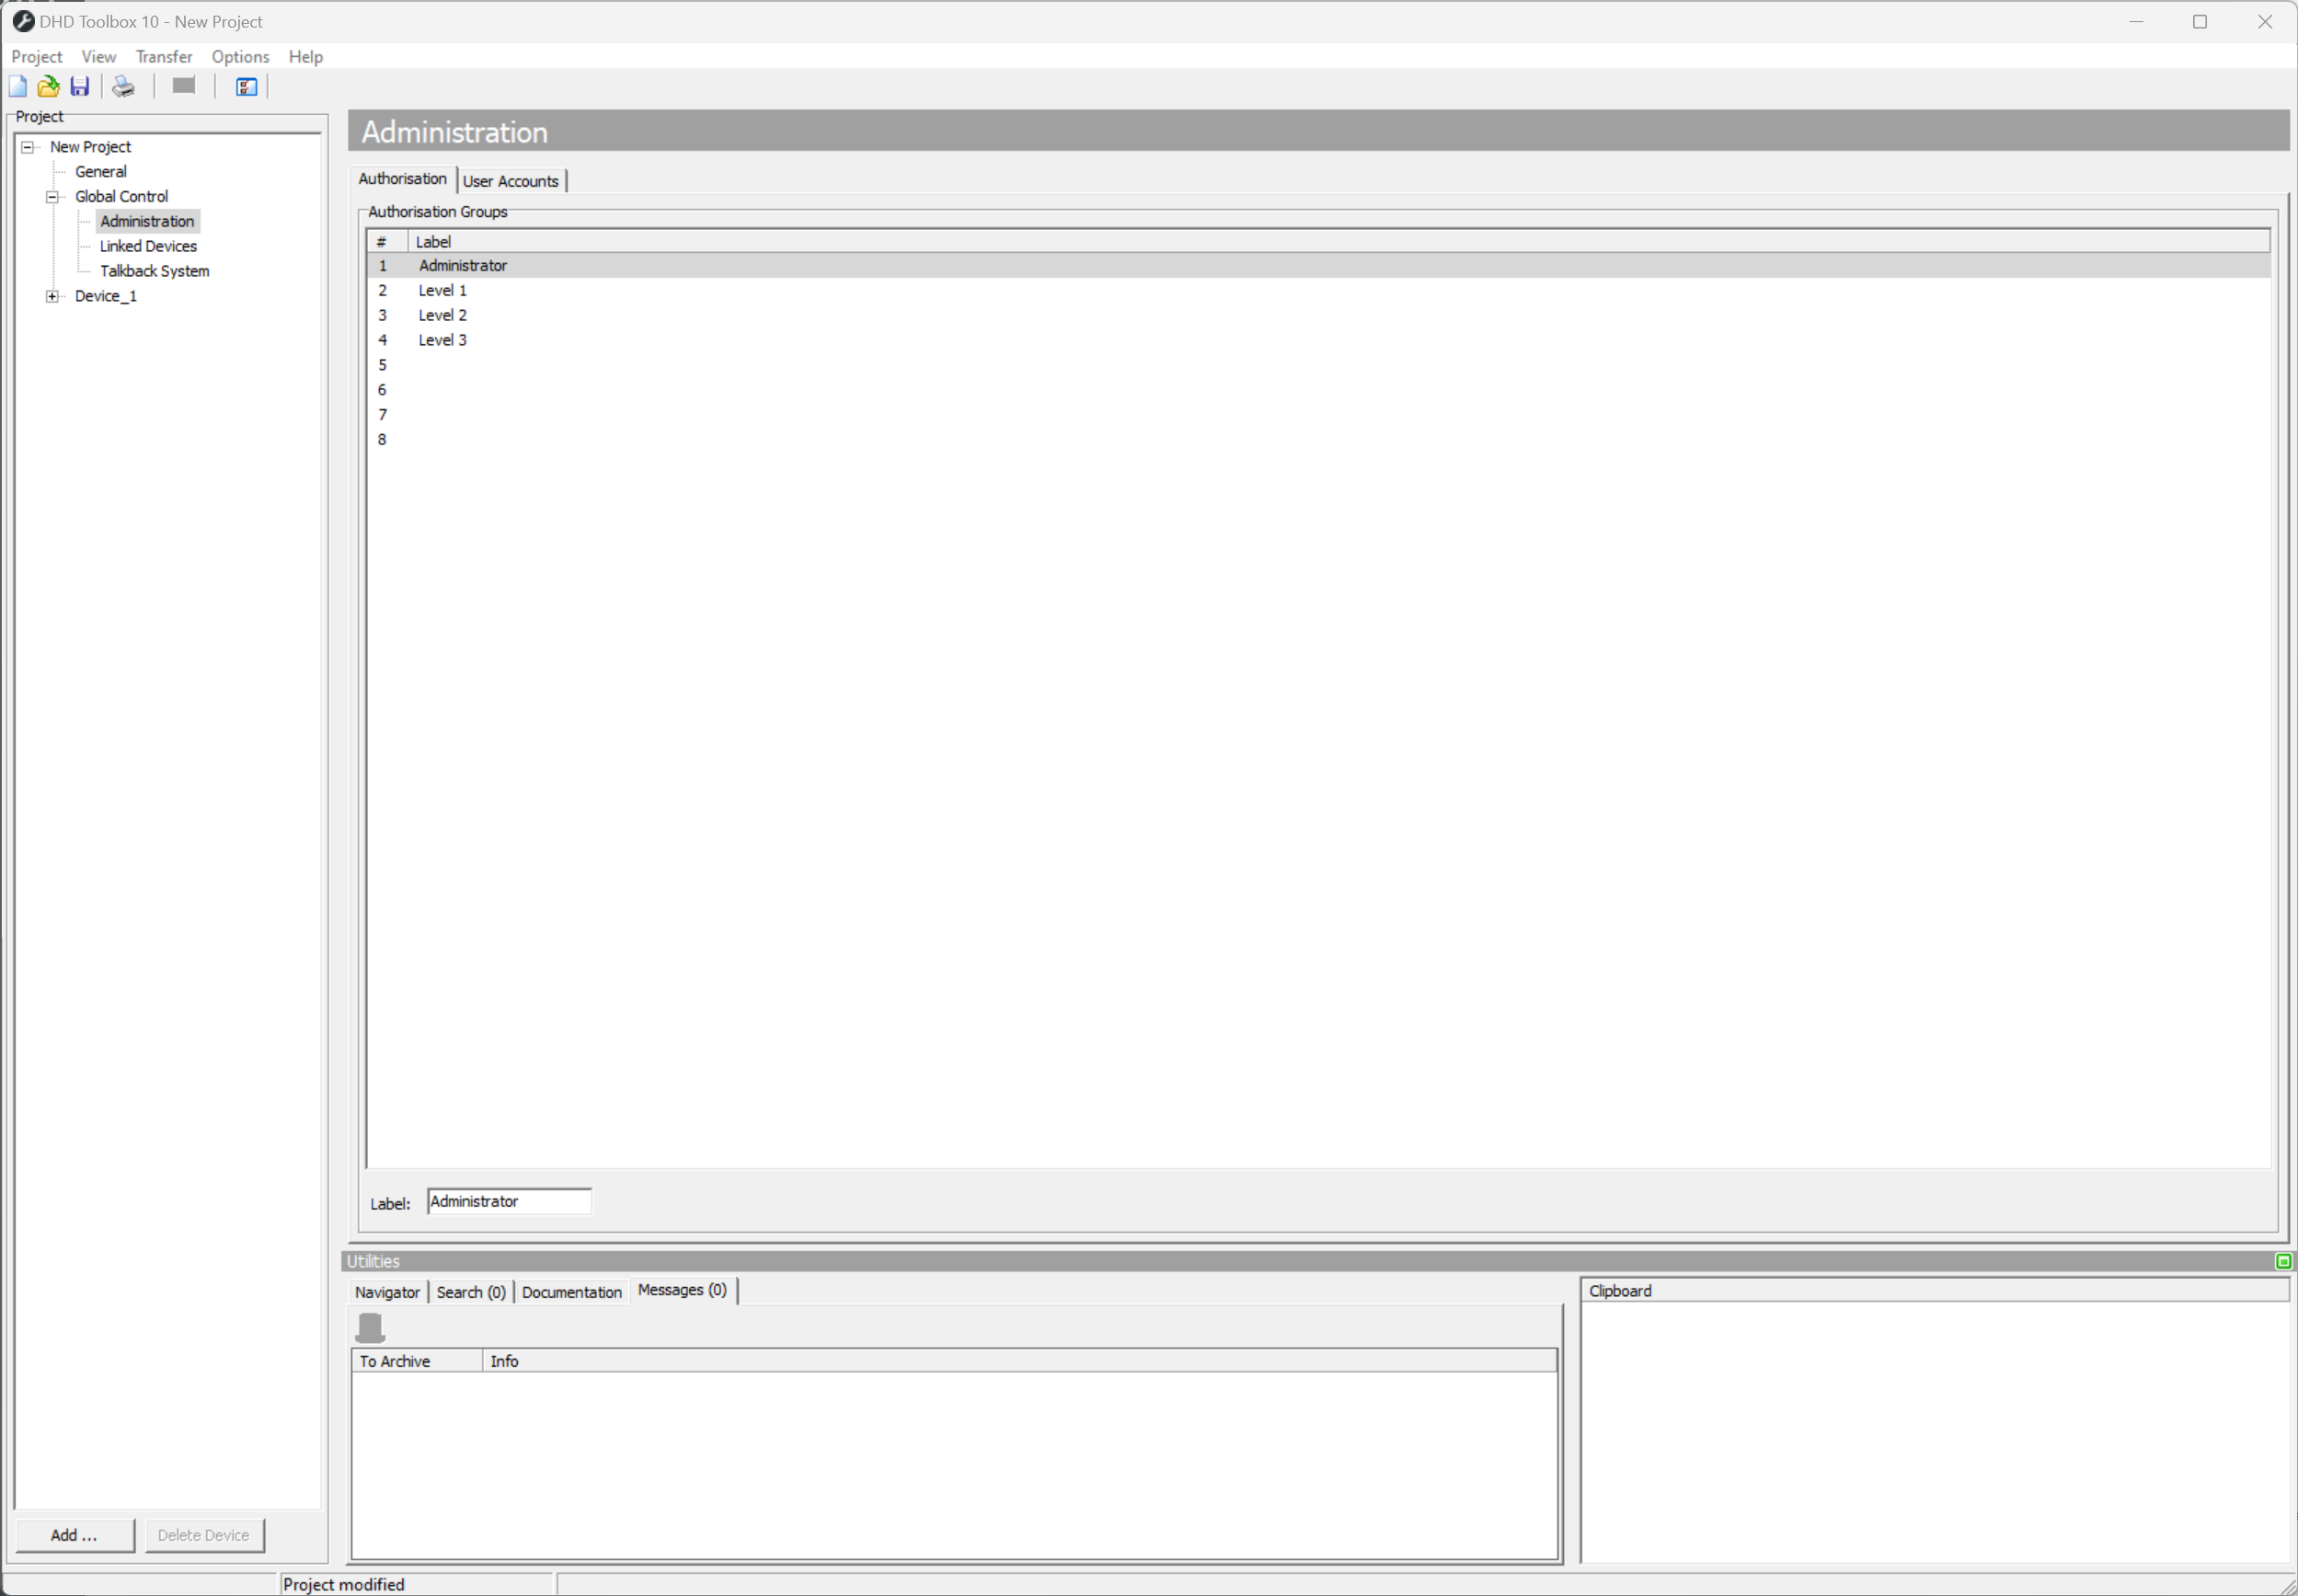
To add or edit one or more of the displayed authorization groups please open up your Toolbox software and follow the steps listed below:
- Open up your project's drop-down menu in the toolbox program
- Go to
Global Controlafter adding your first device to the project - Open the
Administrationmenu - The
Administrationmenu allows you to label up to eight different authorization groups per project
Authorization group 1 is labeled as Administrator by default, while the following groups will be labeled as Levels 1 to 7 in descending order. These names form recommendations only.
User Accounts window, that can be accessed via the Administration menu, gives access and allows the system administrator to edit user data through the toolbox software.
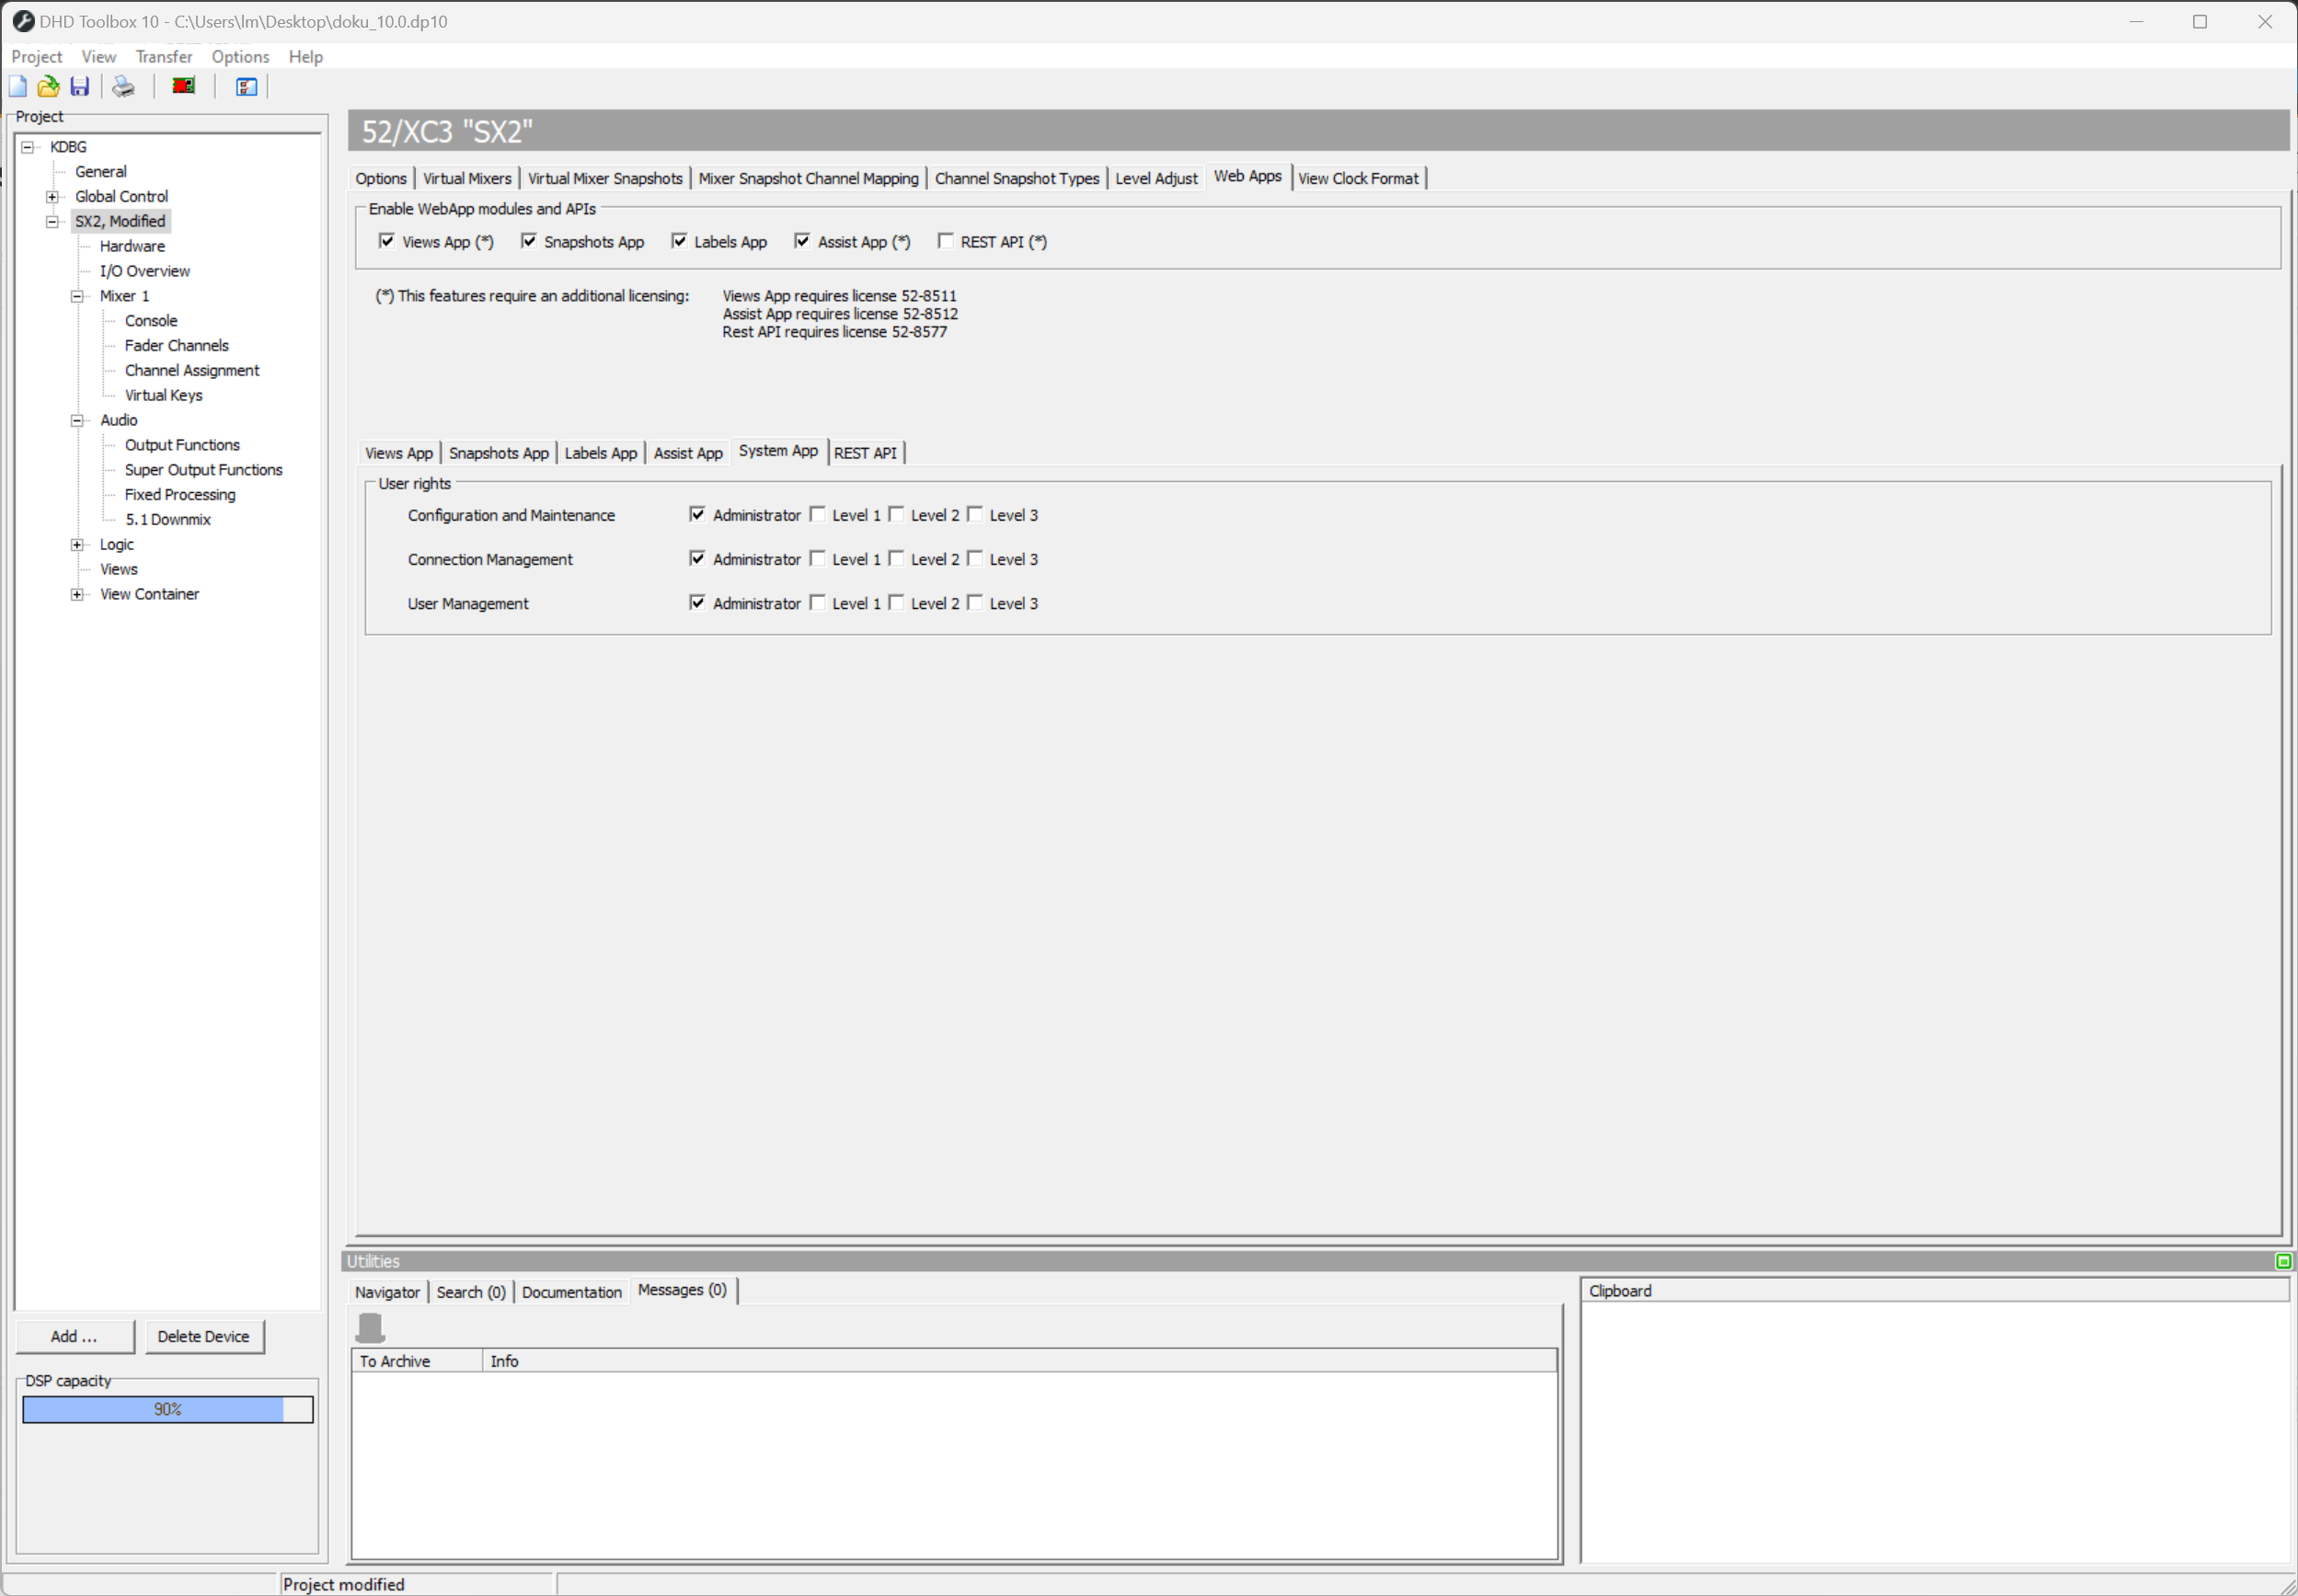
Through the Web Apps menu rider in toolbox software you can manually configure user access and authorisation rights by using the System App menu and checking level access for Configuration and Maintenance. Connection Management and User Management individually.
Another feature available through the Edit User page is Auto Lock (Console). Through opening up the drop-down menu displayed on the right side you can edit the amount of time it takes till your console is automatically locked down.
Be sure to confirm your decisions by clicking the Save button. Unsaved changes will not be taken over after leaving the Edit User page.
The API-Token menu option allows you to generate and copy a valid WebApp API-Token code for your user account. Click Copy to copy the displayed API-Token or Generate to auto generate a new valid API-Token code.
Adding New Users to the System
To add new users to your system's authorization groups, you can use the Add User page by clicking the Add New menu option on the User Management page.
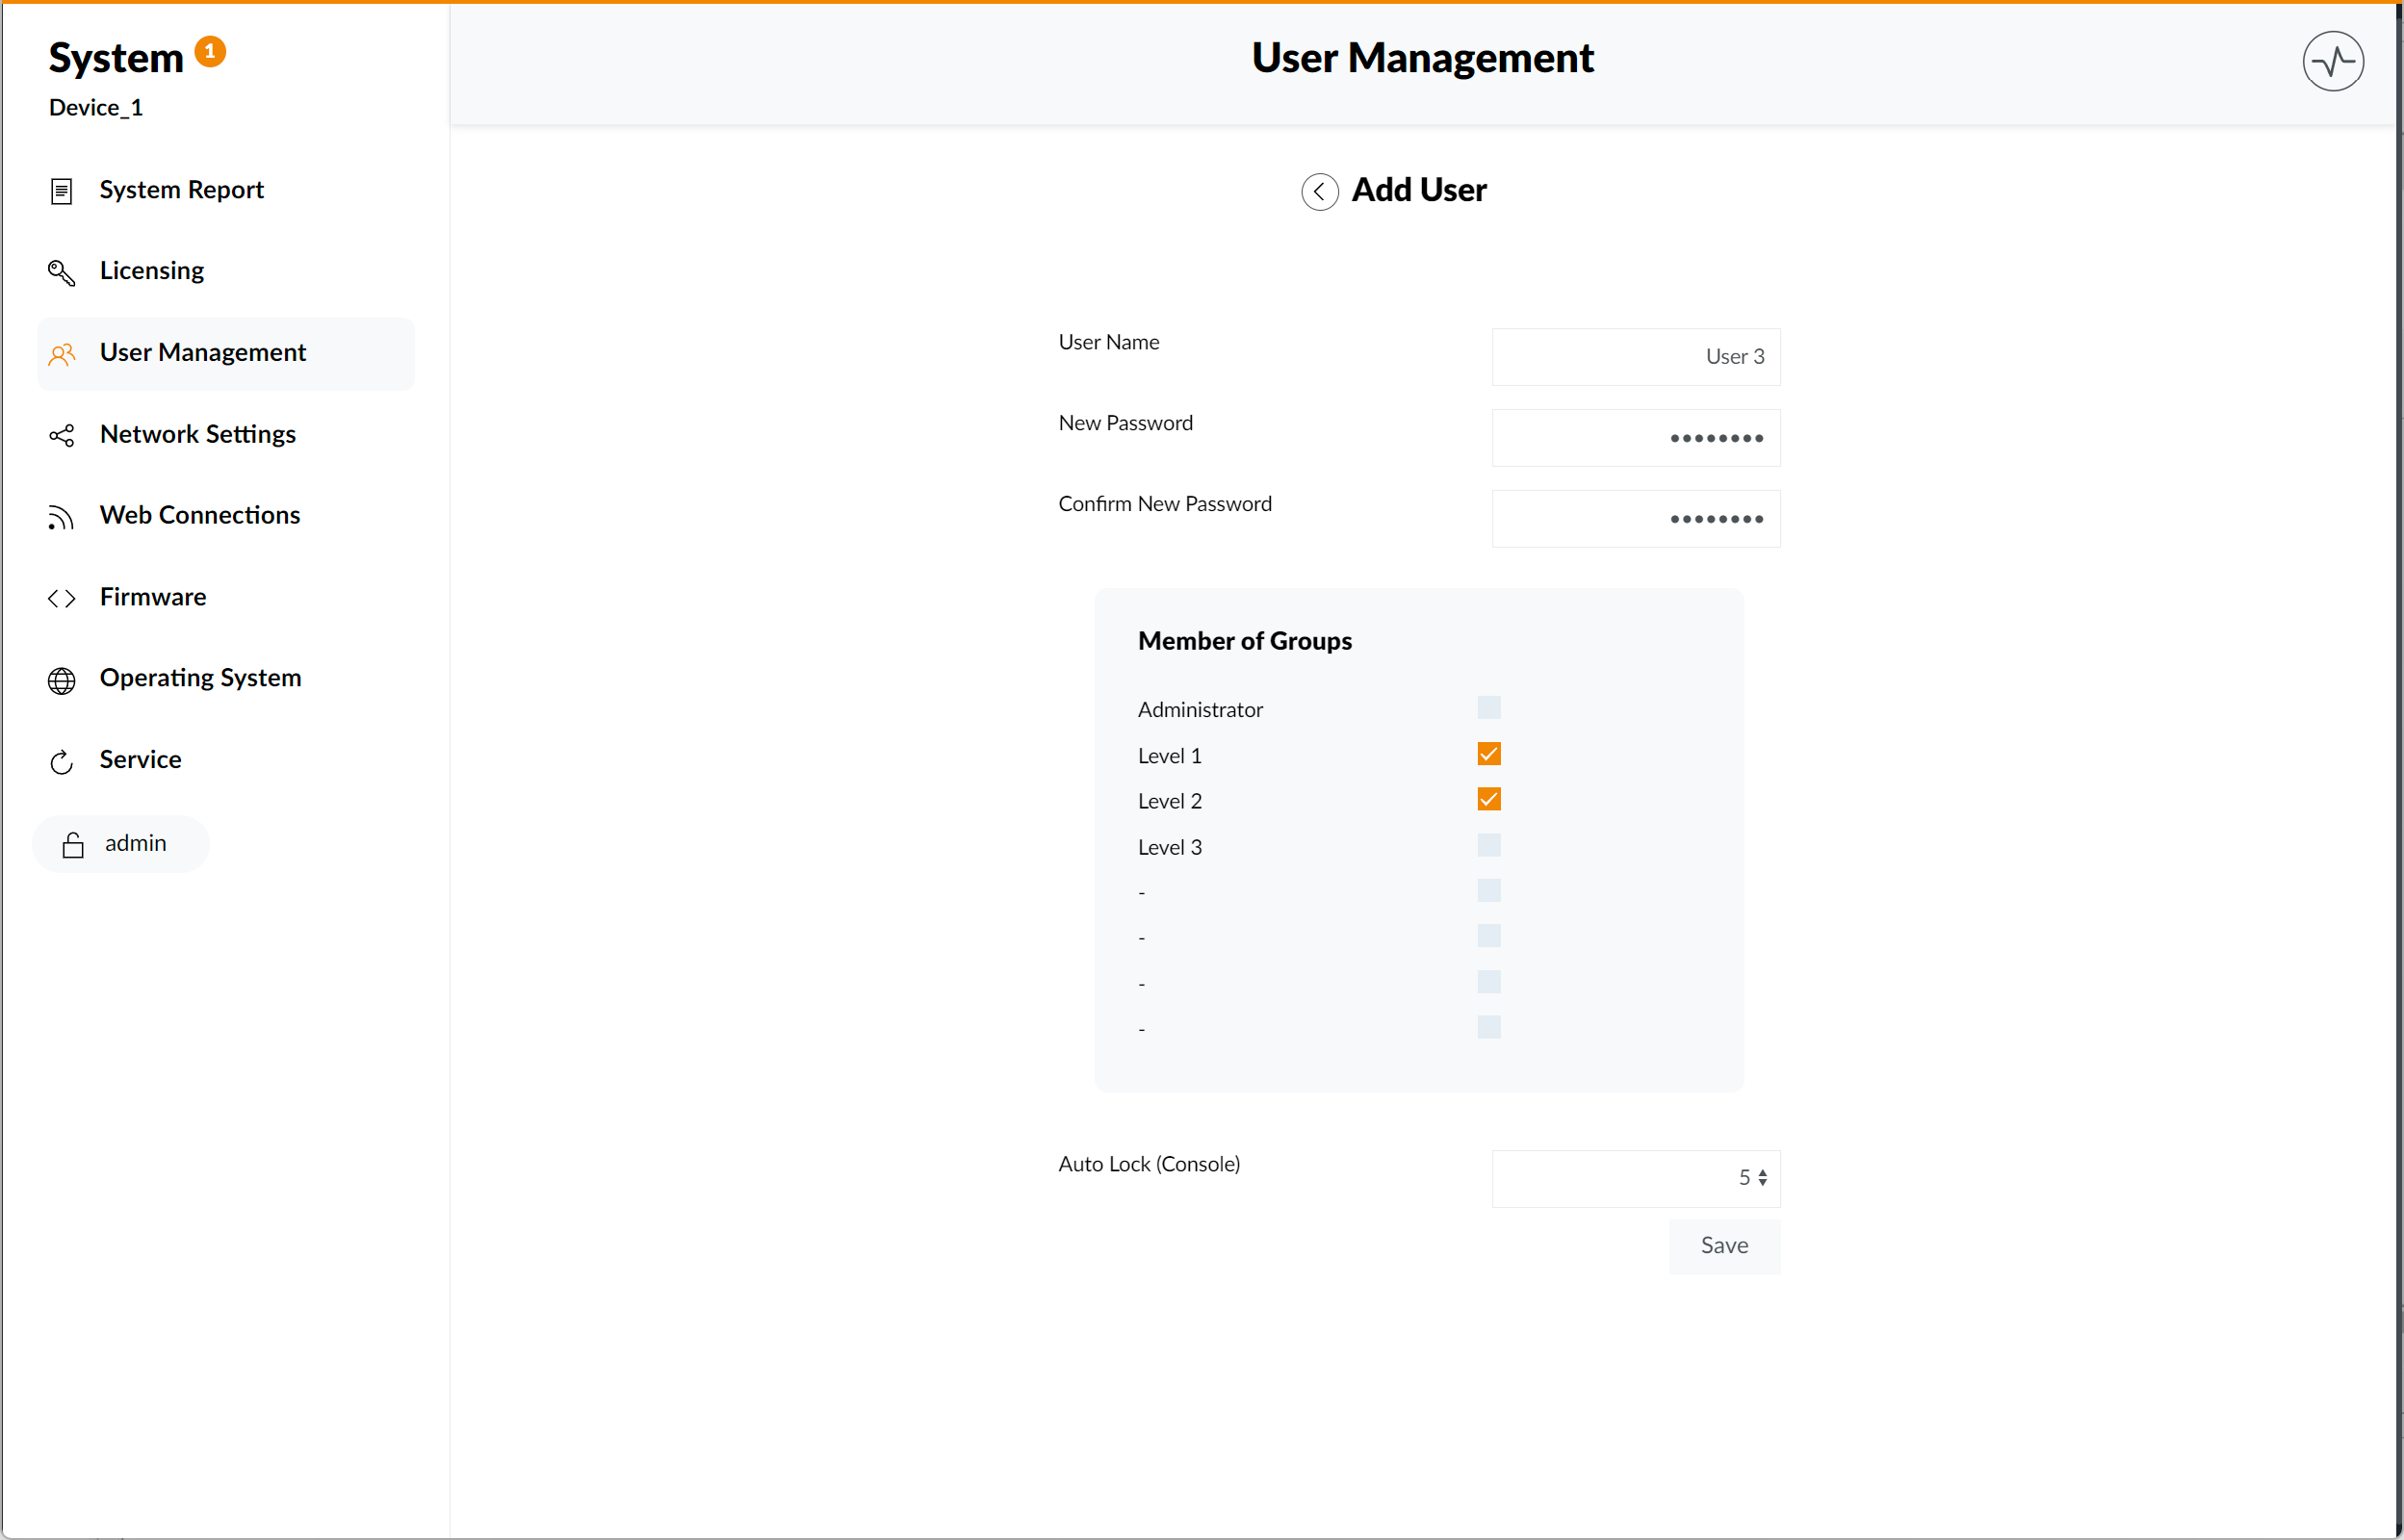
To create a new user account please follow the steps listed below:
- Add your user name in the
User Nametext box - Add a new password in the
New Passwordtext box - Confirm the new password via the
Confirm New Passwordtext box - Sign into the authorization groups you would like to access, by checking the corresponding boxes in the
Member of Groupsmenu option - Confirm your console auto lock by choosing a timeframe in the
Auto Lock (Console)drop-down menu.
Be sure to confirm your decisions by clicking the Save button. Unsaved changes will not be taken over after leaving the Add User page.
Configuring User Server Settings
The User Server page allows the system administrator to configure the user database settings in the WebApps software. It can be accessed through clicking the Configure User Server menu option.
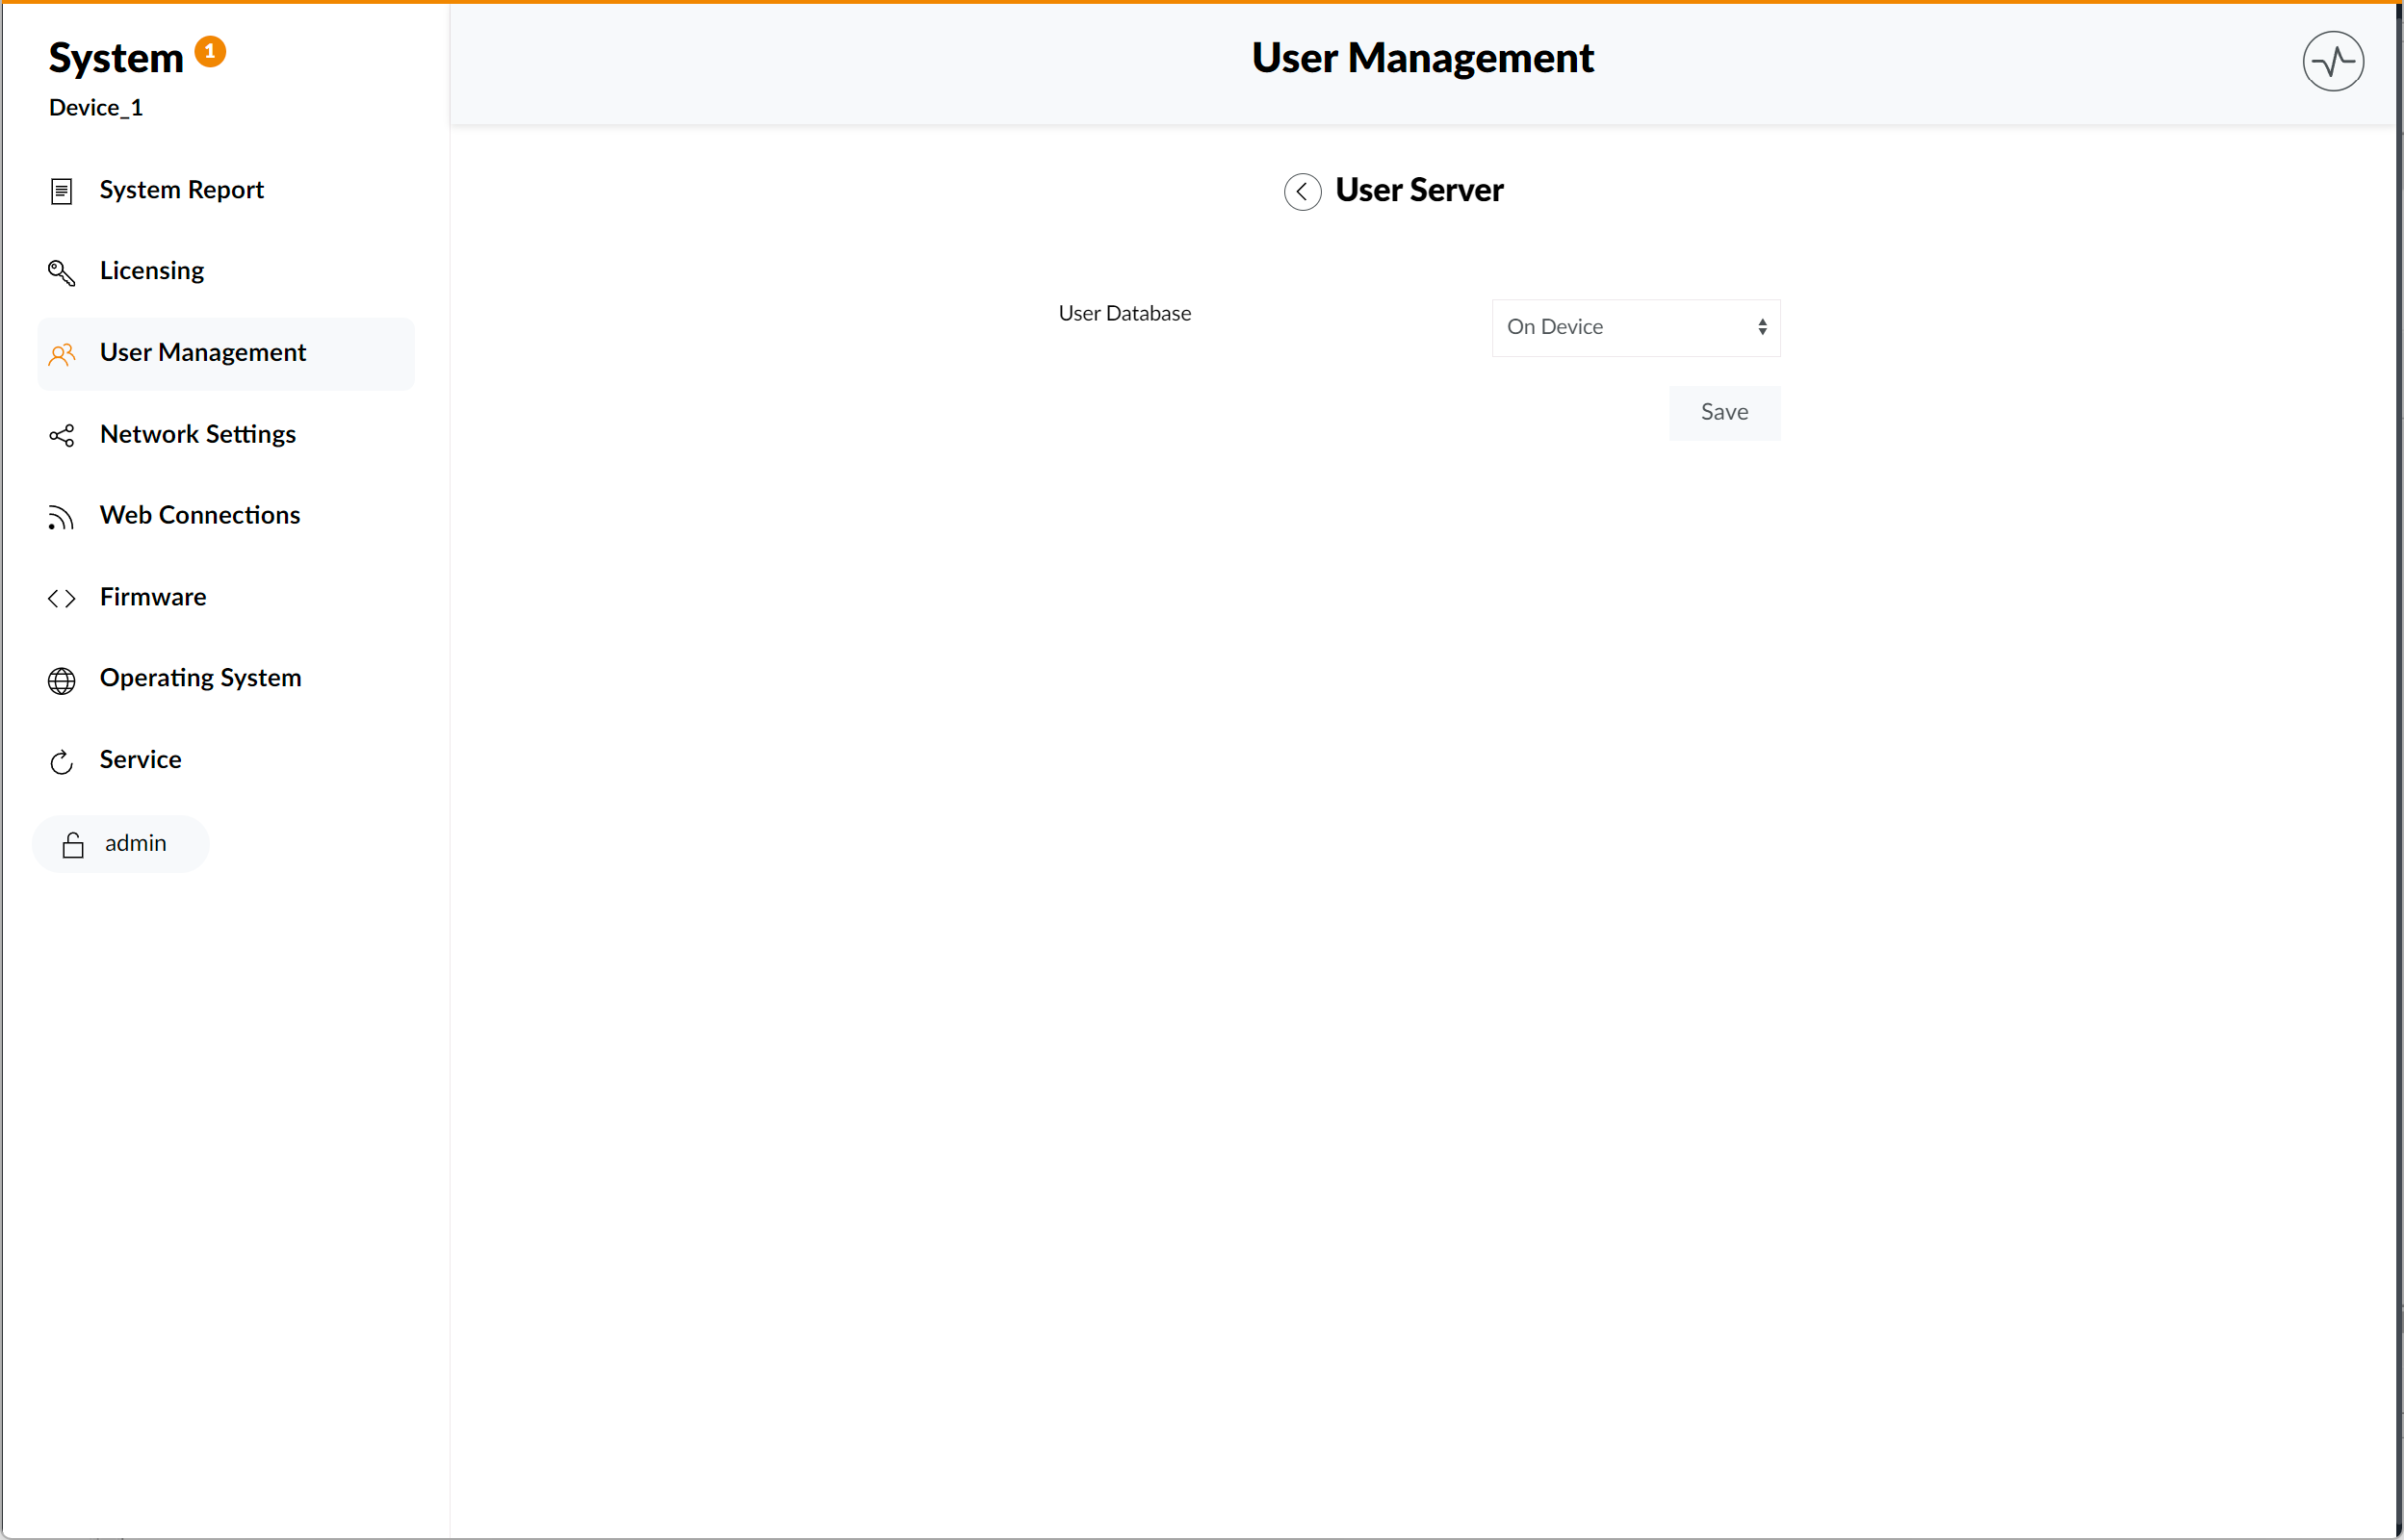
When choosing a user database you can decide whether to use your DHD devices database (On Device option) or the database of another DHD Device (Other DHD Device option).
Should you decide to access the database of another DHD Device new menu options will be displayed on the page.
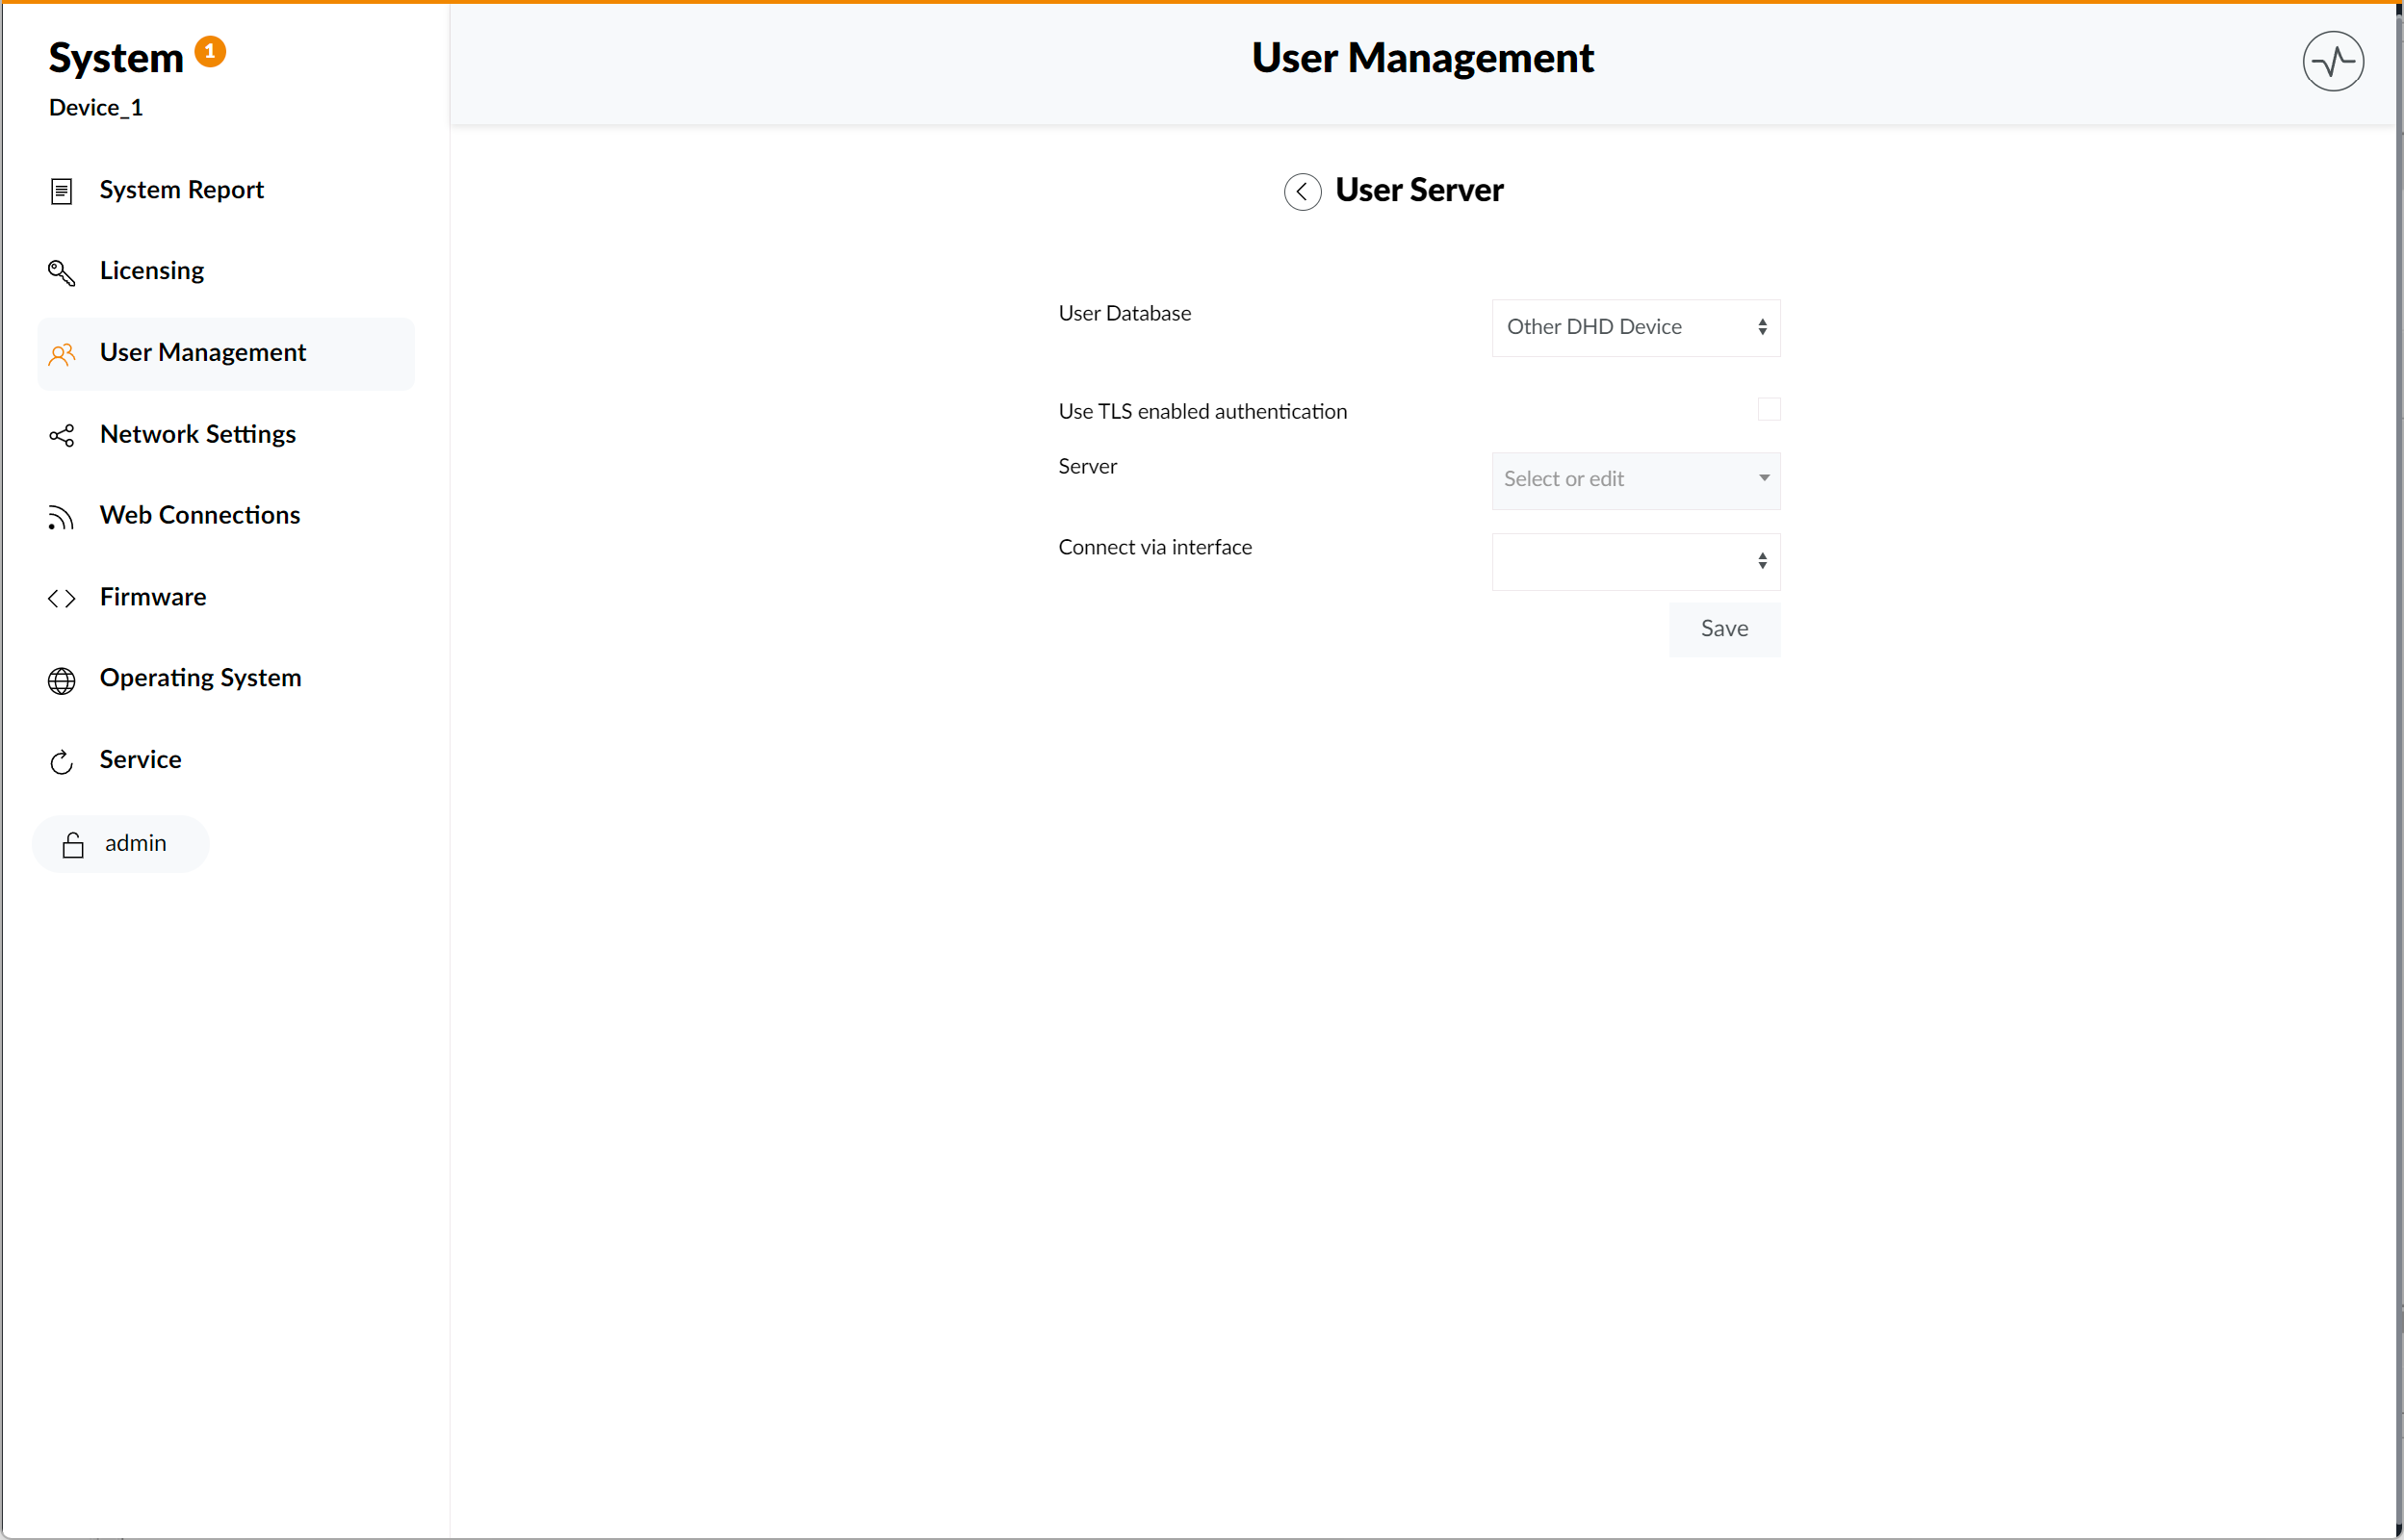
You can check the Use TLS enabled authentication option, if your DHD device is using a TLS setup.
The Use TLS enabled authentication option requires a valid TLS setup on all participants using the server.
Using the Server window, you can access a drop down list of all available device servers.
Finally, you can decide if your device is connected via an interface and how this connection is made using the Connect via interface drop-down menu.
You can choose to leave out interface connection by leaving the Connect via interface menu option blank.
Be sure to confirm your decisions by clicking the Save button. Unsaved changes will not be taken over after leaving the Add User page.
Manage Apps and User Rights
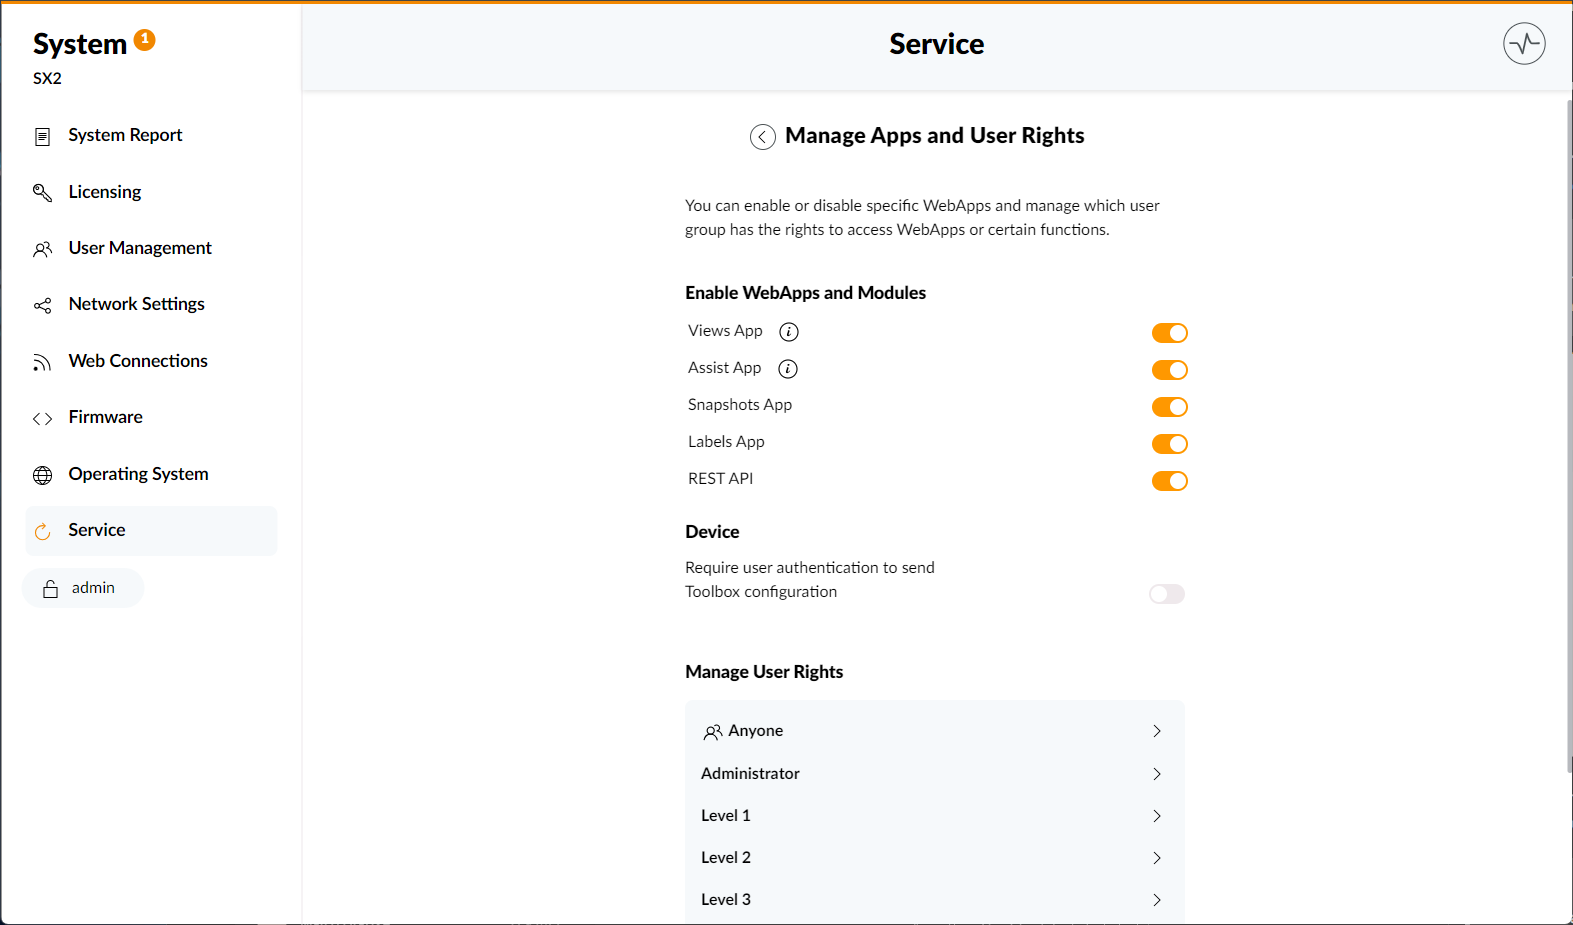
The Manage Apps and User Rights page allows you to enable or disable specific WebApps and manage which user group has the rights to access WebApps or certain functions. It can be accessed through clicking the Manage Apps and User Rights menu option.
Click here for further information on using the Manage Apps and User Rights page.